
|
|
#81
 06-23-2011, 02:18 PM
|
||||
|
||||
|
See this in Sukhoi forum some years ago - dont remember the builder name.
 http://translate.googleusercontent.c...FvoVKOSr14epKg M$ FF base + Mig21 (?) grip. Sokol1 Last edited by Sokol1; 06-25-2011 at 11:33 PM. 
|
|
#82
10-24-2011, 02:41 AM
|
|||
|
|||
|
I've had to fix one of mine a couple times because of failing momentary switches by soldering in new ones. This was a few years ago now so my memory is bad but I found the switch type online and by some wierd chance the manufacturer had an outlet that just opened in my city. I just walked in and bought a bunch of them for dirt cheap.
  
|
|
#83
12-30-2011, 06:16 PM
|
|||
|
|||
|
Hi,
I just bought this game and decided to blow the dust from my MS FFB2 and try it but I think it's broken... so I was wondering if anyone had the following problem and knows a solution... I'm running Windows XP, installed the software, connected the joystick but when I went to test it...I got this  The Rudder bar starts like that and when I twist it to the right, it doesn't reach the end I'm thinking something broke? I had it inside the box but there was a heavy object on top of it, so maybe it forced something? Anyway, just wanted to see if any of you guys could help me. Thank you for your time. P.S. - I've cleaned the sensors like I read here and still nothing.
|
|
#84
12-30-2011, 11:27 PM
|
||||
|
||||
|
Well, mr Devil, i donk know the joystick, so dont know what caind of sensors it uses. But it can be something forced in the sensor/pot, (or excess of use) it can also be calibration, or something in the electronics. If calibration,
try some programe to calibrate, instead of using only the windows calibration. The windows calibration "sucks". So, do it manually. I use 2 programes, but there are more. What i use is freeware: DIview, and Dxtweak2. Just spend some minutes and sure you will understand how the programe works. You will input the nunber you want for center, and also were it starts and were it ends. Even if it doesnt help you, it is a precious tool to work with game controlers. Last edited by Bolelas; 12-30-2011 at 11:37 PM.
|
|
#85
12-31-2011, 12:54 AM
|
|||
|
|||
|
Quote:
|
|
#86
12-31-2011, 01:03 AM
|
|||
|
|||
|
The rudder pot is in the handle. Tip the stick on it's side to the left and lift off the top half of the grip after removing the five screws in the handle. From memory it's a standard pot with three wires soldered to it. Once you have sourced a replacement it'll only take about half hour max to replace
|
|
#87
12-31-2011, 04:58 PM
|
||||
|
||||
|
You should be able to reach the other end of values, also using the DXTeak programe. Observe the RAW values at the problematic end and calibrate the black scale to the same value. Changing the pot its not difficult, but finding the spare part is. Besides, the range of the pot should be about 30º and "normal" pots have 270º, so even if you use the correct resistance value, you wont get 100% use in only 30º travel angle. You can allways disconnect pot, extend wires to outside, make a ruder pedall and connect the 3 wires from joystick. In this option, the best way is to use magnetick hall efect sensors, sensivity 5.0
If you need more info, i can tell you were to buy them in Portugal. Currently i am builting a throttle quadrant to the game: 2 pots and 2 hall sensors, with game pad electronic board. Happy new year!
|
|
#88
01-11-2012, 03:55 AM
|
|||
|
|||
|
Saw this the other day at the DCS forum and thought I'd link it here as it maybe the most incredible MSFFB2 mod ever!
http://forums.eagle.ru/showthread.php?t=83814
|
|
#89
01-19-2012, 11:09 AM
|
|||
|
|||
|
Hi all,
This posting is almost a "copy and paste" of this thread that Scarecrow has linked and post it here again to share it with you -because I'm really,really very satisfied with this controller. -smile- And most of my inspirations to do something like this I got from this thread! So I decided it's time to open a account here to be able to answer directly if you have questions . First a video : (BTW: if you are wondering what it this thing I tilt 90° and use as a collective: A picture Tale: "Dual Thrust" or "What I did in my Easter Holiday") Short summary: I always used a MS-FFB2 for DCS-BlackSchark but I was very unhappy with the lack of buttons on the stick in DCS-a10. I switched forth and back between the Cougar and the MS-FFB2 - and this was very unsatisfying and I searched for a solution for this lack of button/lack of FFB dilemma... Finally I found it by digging up this video: http://www.veoh.com/watch/v16515202T...Cougar+FFB+Mod And after some testing... (read more about my first steps here: http://forums.eagle.ru/showthread.ph...91#post1304491) ...I was not really satisfied with the power of the FFB. 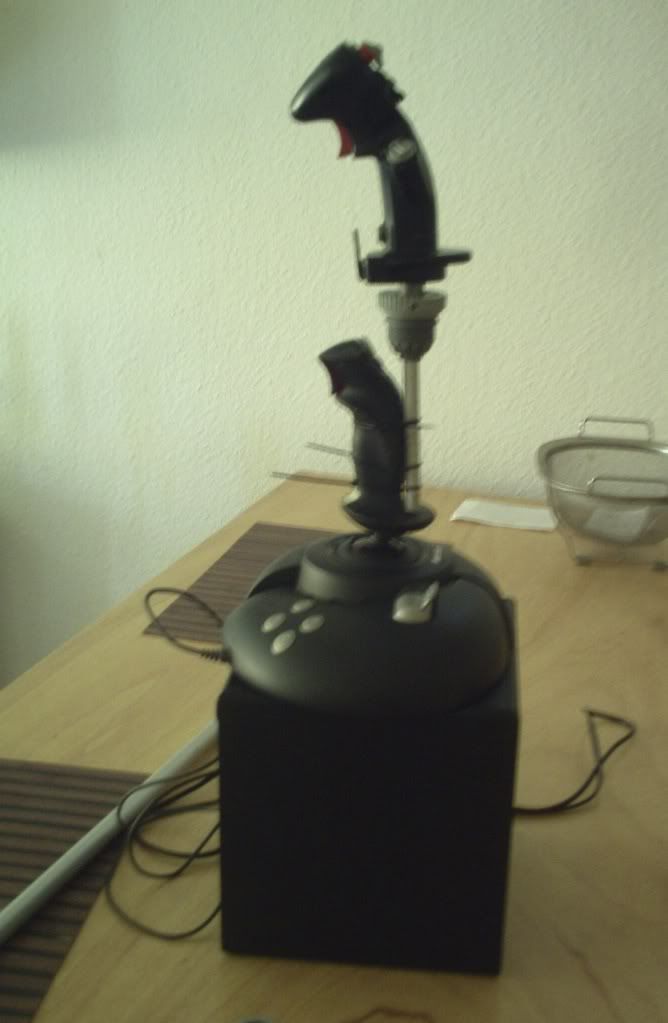 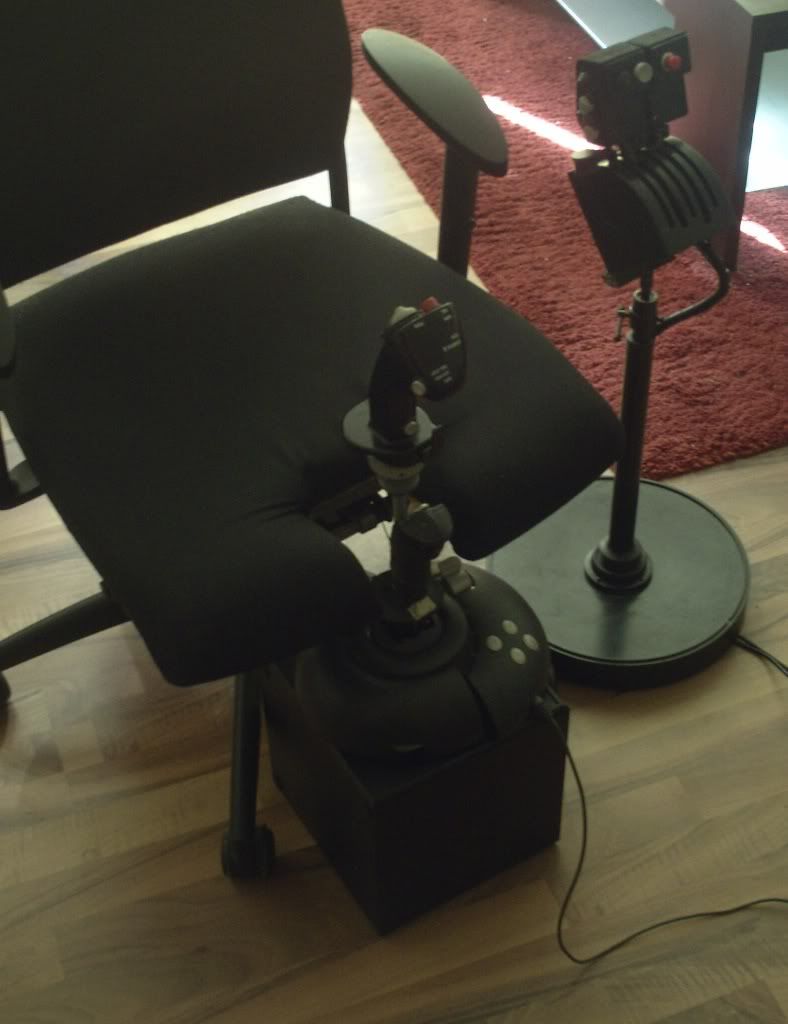 And after I opened my trusty (btw:8 years old) MS-FFB2 for the first time I saw that it might be is possible to attach a second mechanism to it to double the FFB force - so the extended handle will still be hold in place in every situation. I also found out when DirectX send a FFB command it will executed by every FFB controller you add. I found it out by moving my MS-FFB2 and saw that the Logitech FBB-steering wheel turned also in the x-axis the same as the joystick... So I bought the second MS-FFB2 (at a price I don't dare to tell... the seller didn't know what he was offering... - I gave him 10€ extra in the end...). When you plug in two MS-FFB2 - they will react in sync to a FFB command. So I realised that I "only" have to reconnect some wires of the second MS-FFB2 to sync both. - at least in DCS-Simulations. Nice -isn't it ?! So here is what I did Here a some photos of the most important steps with explanation so you get a Idea what I have done. They are not meant to use as a manual and there is no chronological order (!) - it's just how I did it... There are also some steps missing (I just didn't took pictures) Using the methods / circuits / components / constructions as described in this document is entirely at your own risk. If you damage your PC / Joystick / Keyboard / Yourself by any of the things I wrote down in this document, it’s NOT MY FAULT. !!! Snapper reported some problems in IL2 - The both FFB don't work in sync using my method. He will try a different approach using only one FFB circuit board to drive all four motors: Read more about it here: http://simhq.com/forum/ubbthreads.ph...ml#Post3507325 So If you want to build something like this yourself: ask me - and I will try hard to answer! I use a old bass-box of a old 2.1 sound system as casing for the stick.  The dismantled FFB mechanism of both MS-FFB2's 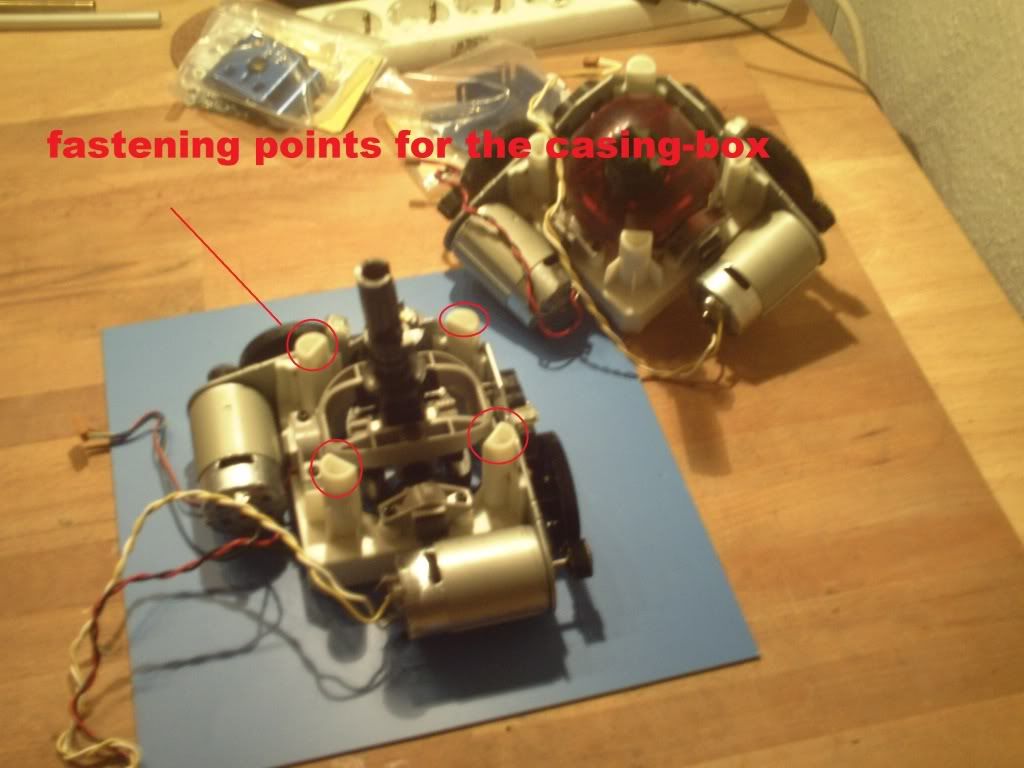 A look inside the casing (bass-) box: 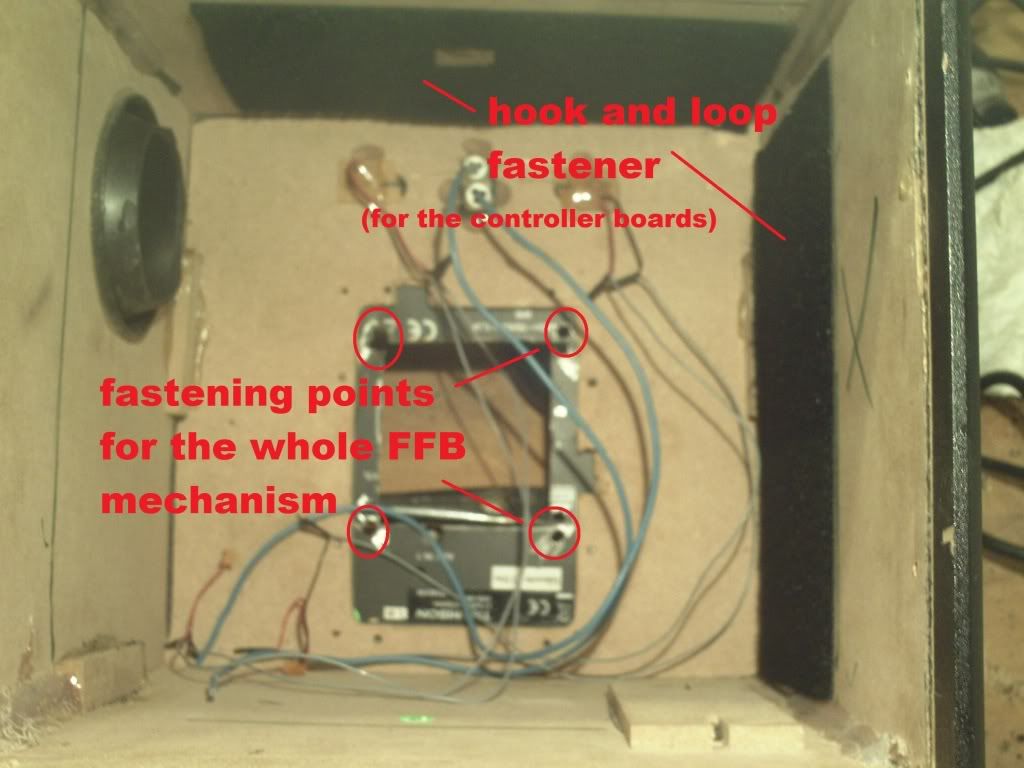 The overall dimensions: 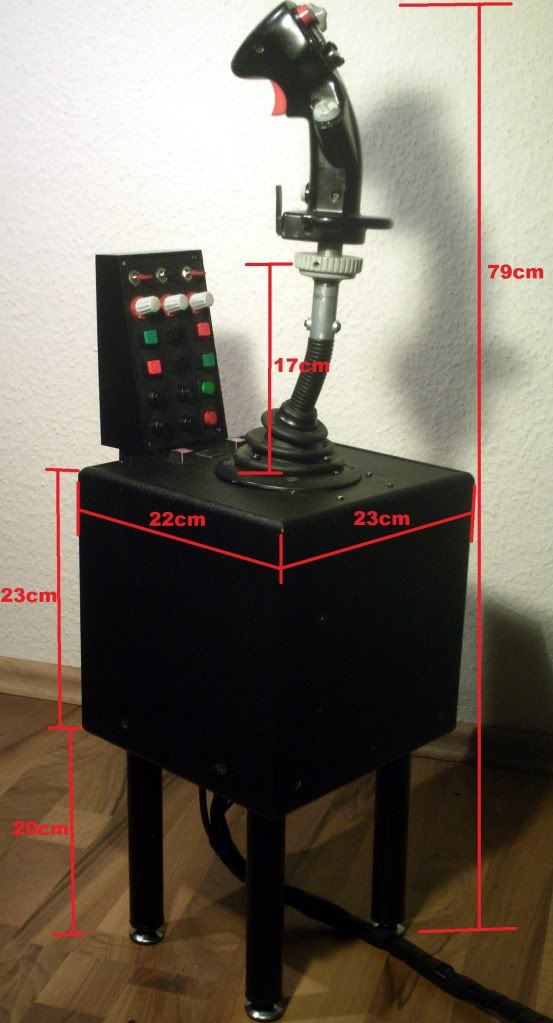 Here you can see how I attached the switch-panel (I used a unused part of the saitek throttle quadrant - that I use as a dual-trust controller) : 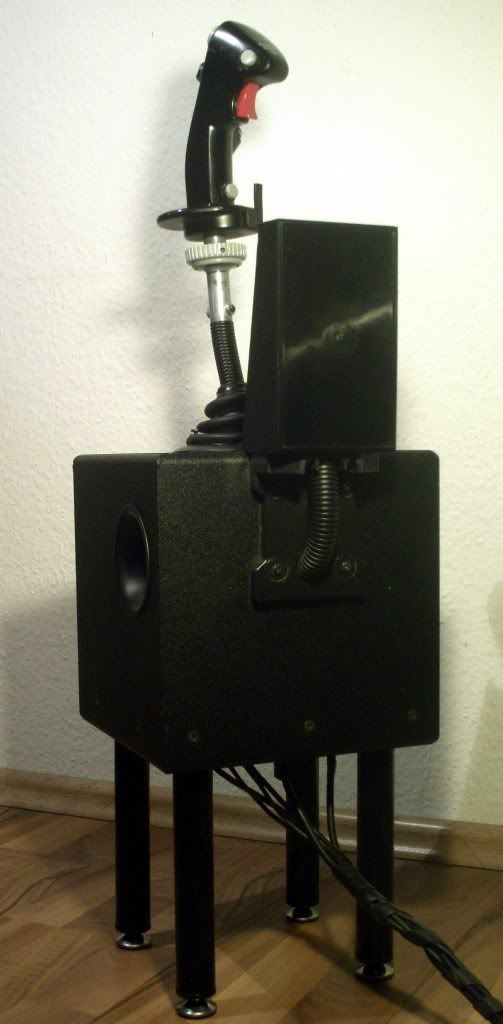 Here is the stick in front of my (also) modified office-chair: 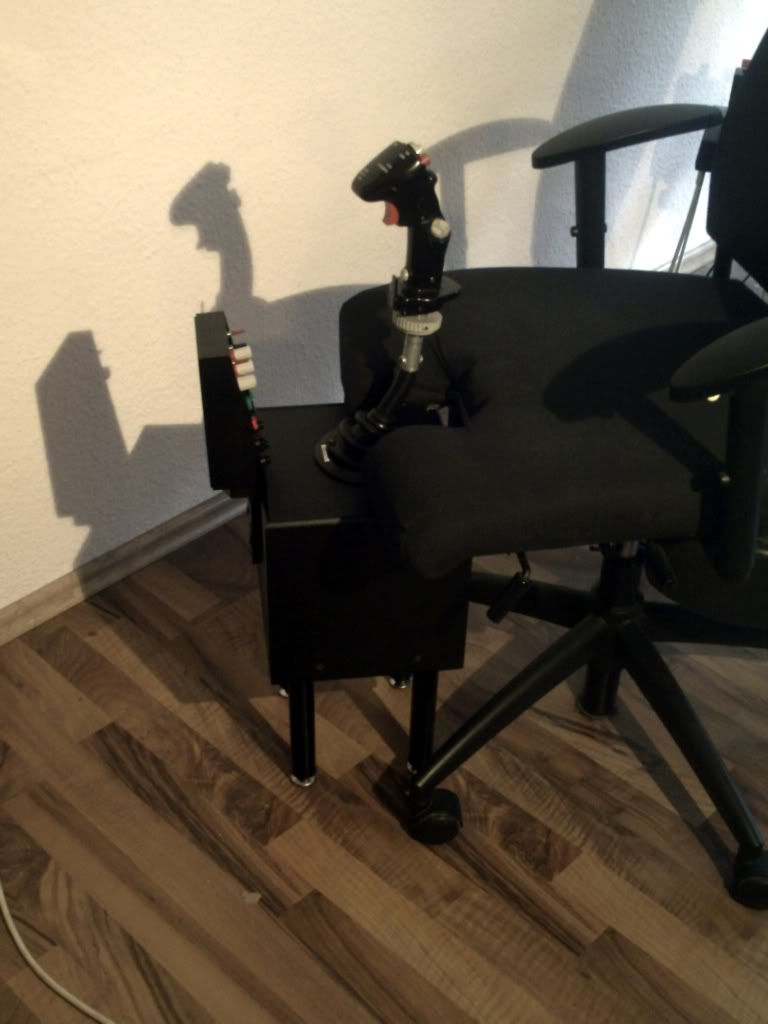 The switch-panel that is driven by the buttons of the two MS-FFB2's 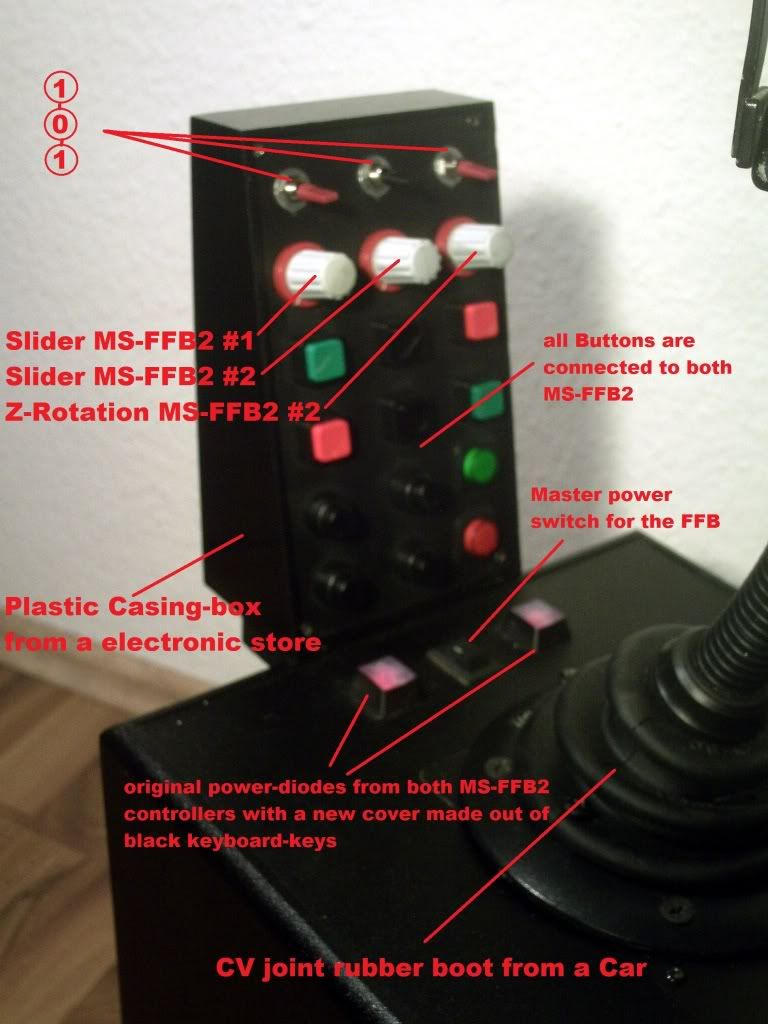 Soldering... 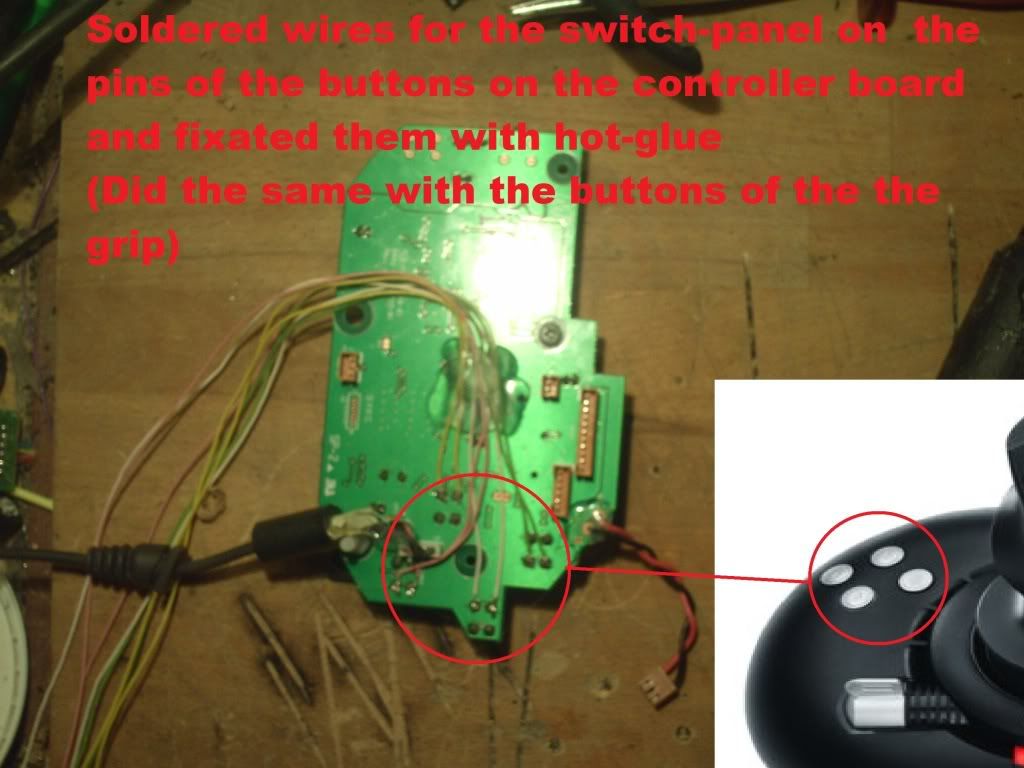 ...even more soldering... (I hate this kind of work!  Both FFB mechanism joint together : 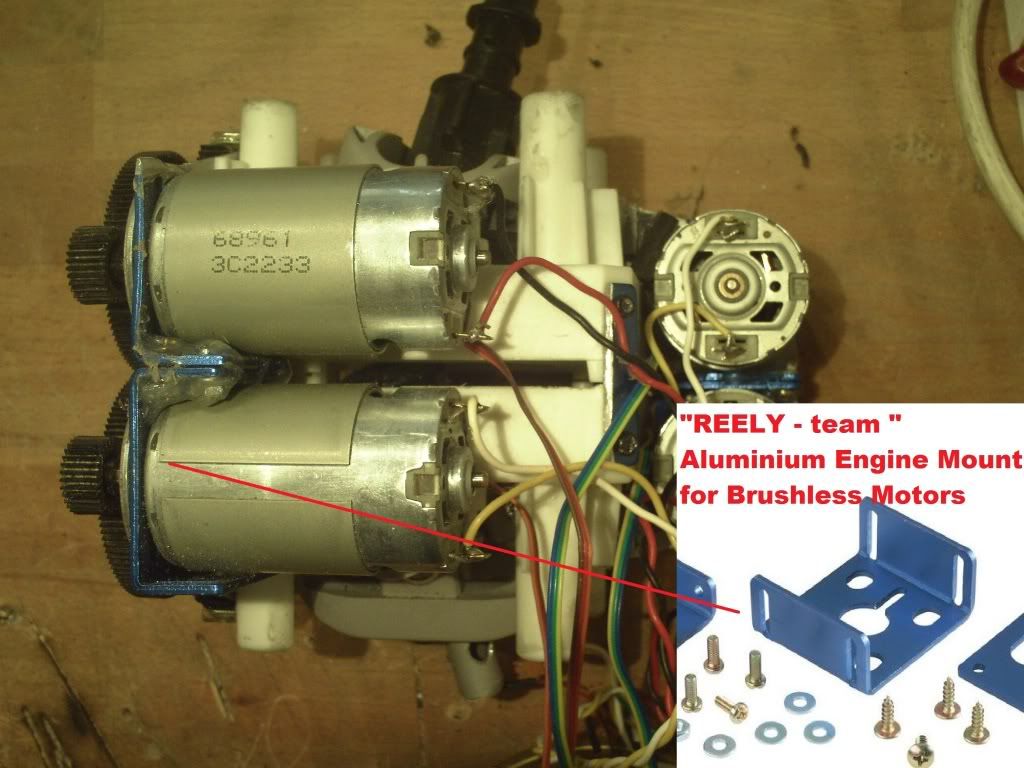 Link to the Motor-Mountings: http://www.conrad.de/ce/de/product/2...SHLESS-MOTOREN They just fit perfect and assure that the gears are already in the right distance! 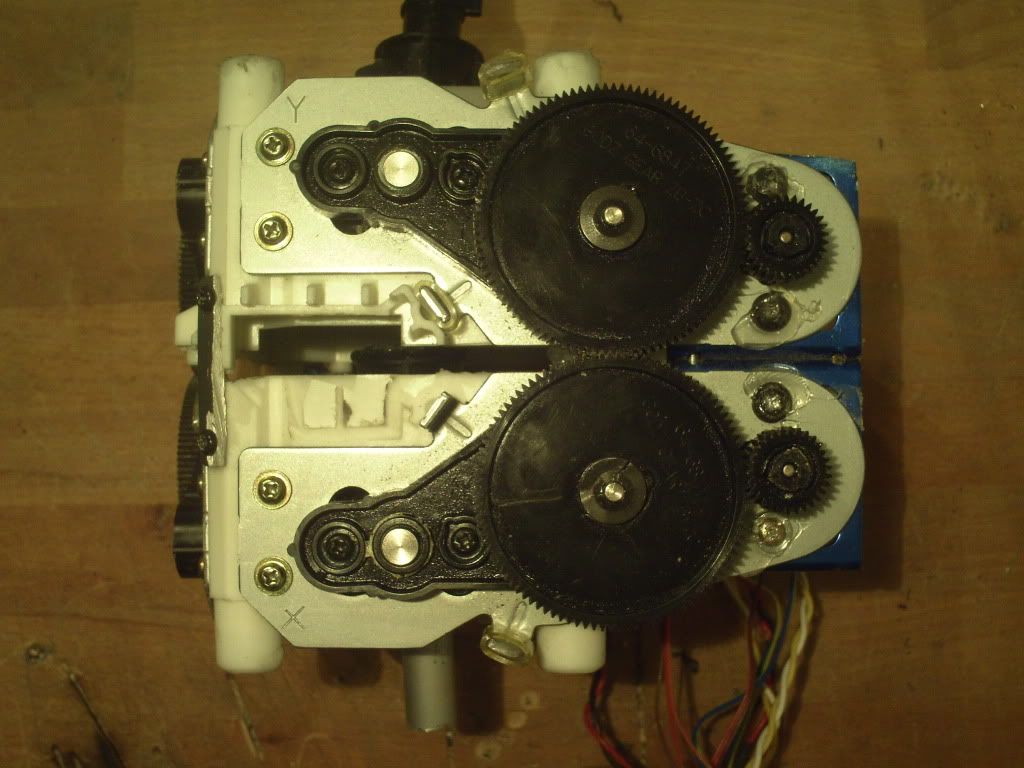 View it from each side: 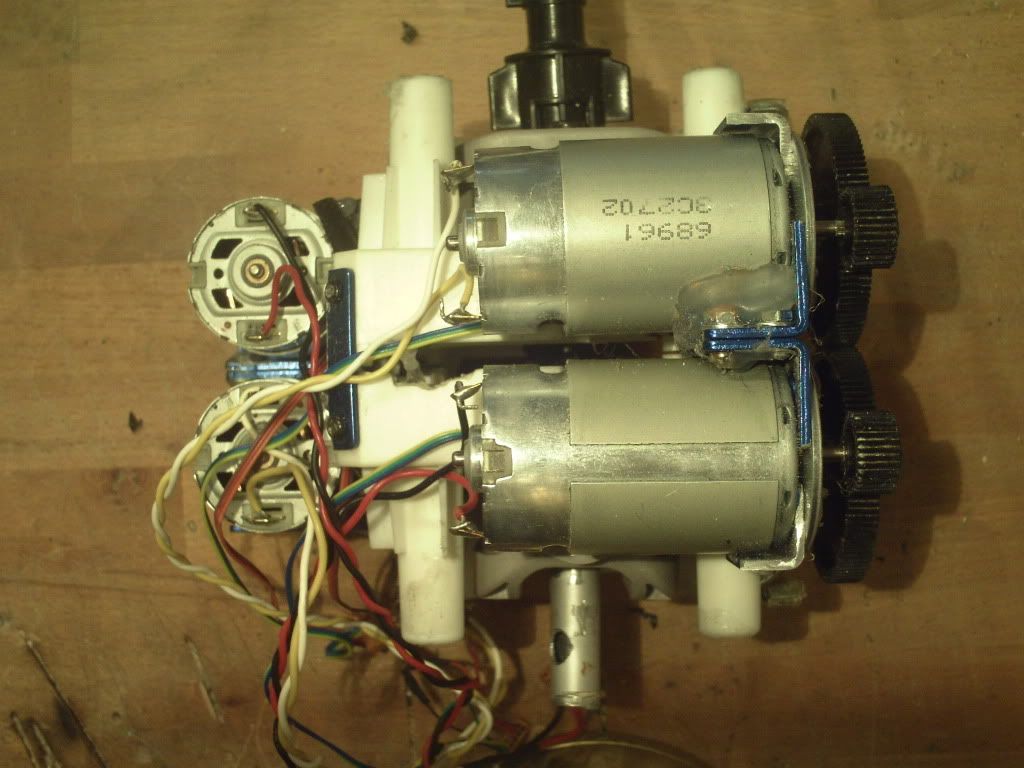 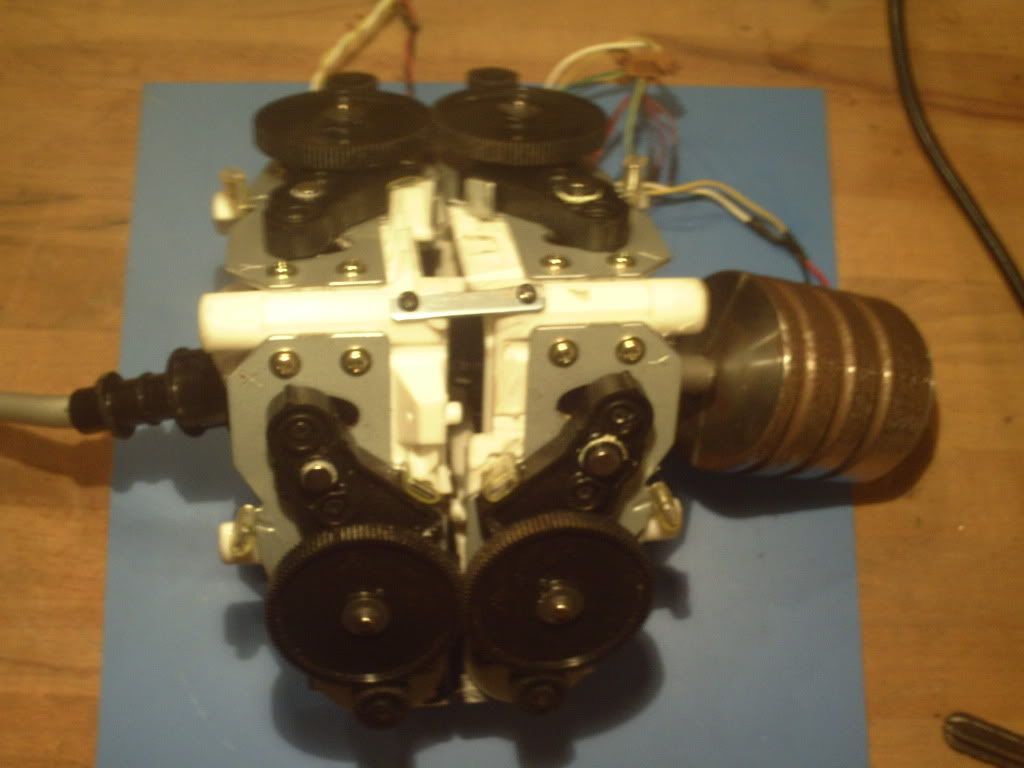 The baseplates came in handy... : 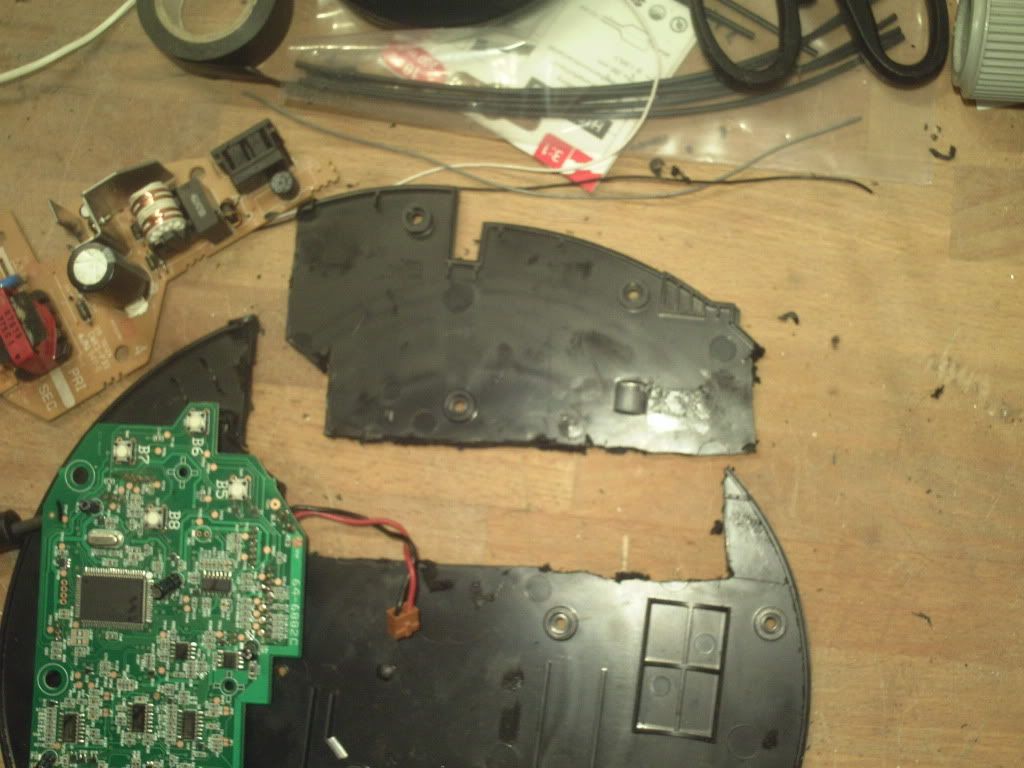 How I solved the "no more room for tools left inside the box" problem:  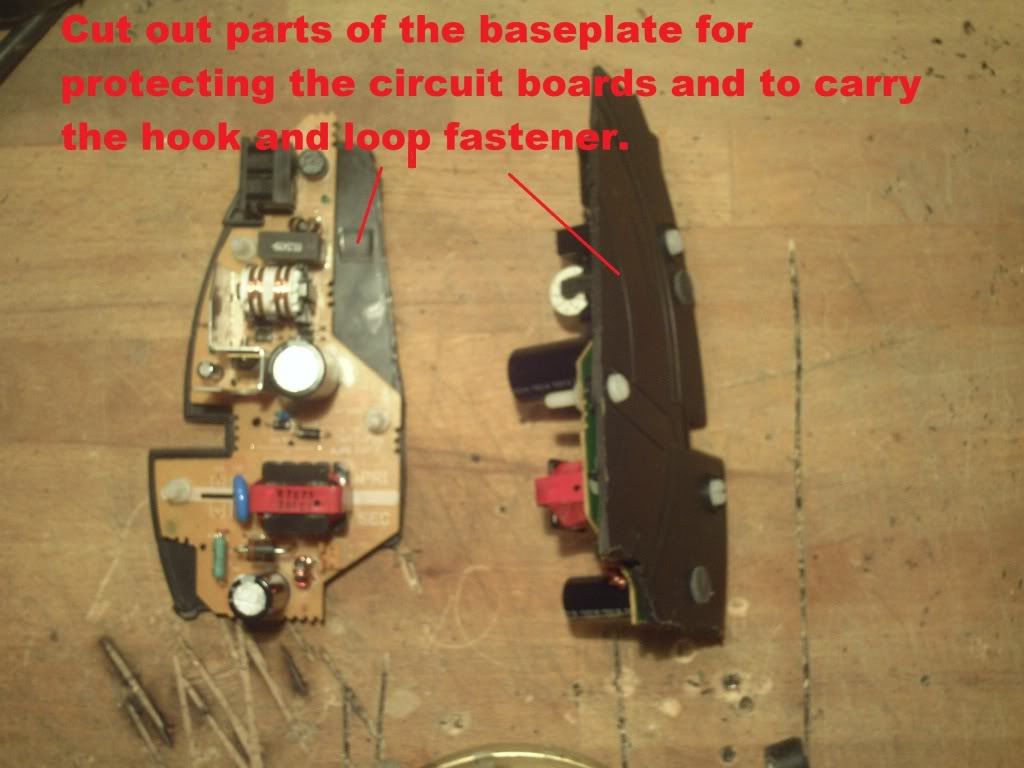
Last edited by Peter_P; 01-31-2012 at 08:47 AM. Reason: Snapper findings
|
|
#90
01-19-2012, 11:10 AM
|
|||
|
|||
|
Here you can see what holds every thing in "balance" and helps the motors to hold the heavy stick in place :
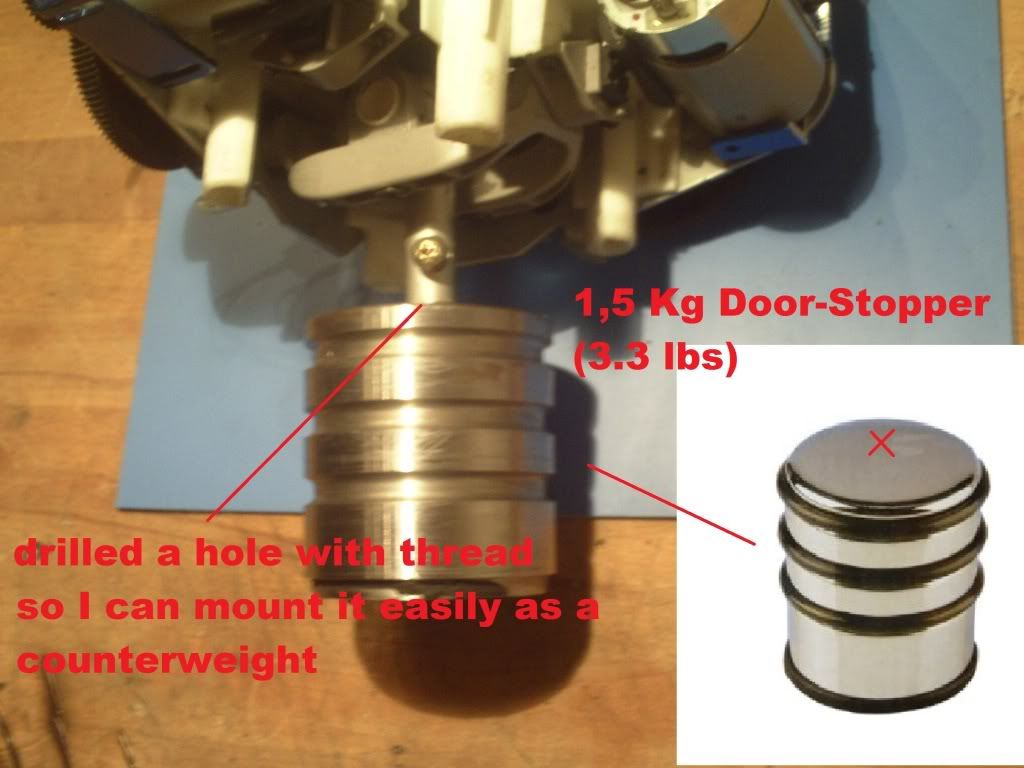 Tip how to calculate the needed counterweight: 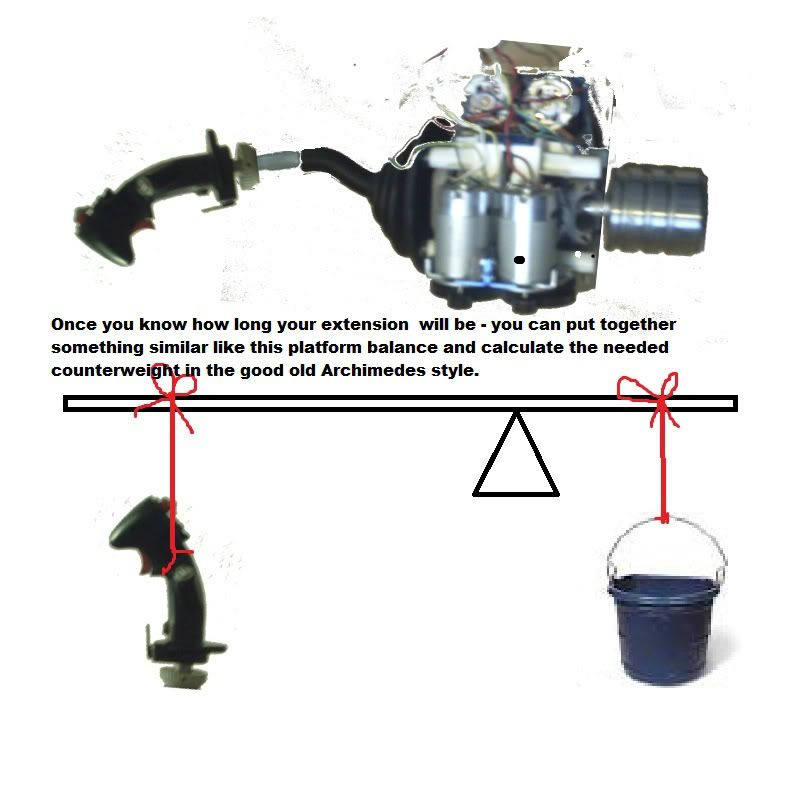 That is tight....and chaotic! (don't worry... - I haver already taped everything together and the gears are not distributed by the wires - but don't have a picture.) 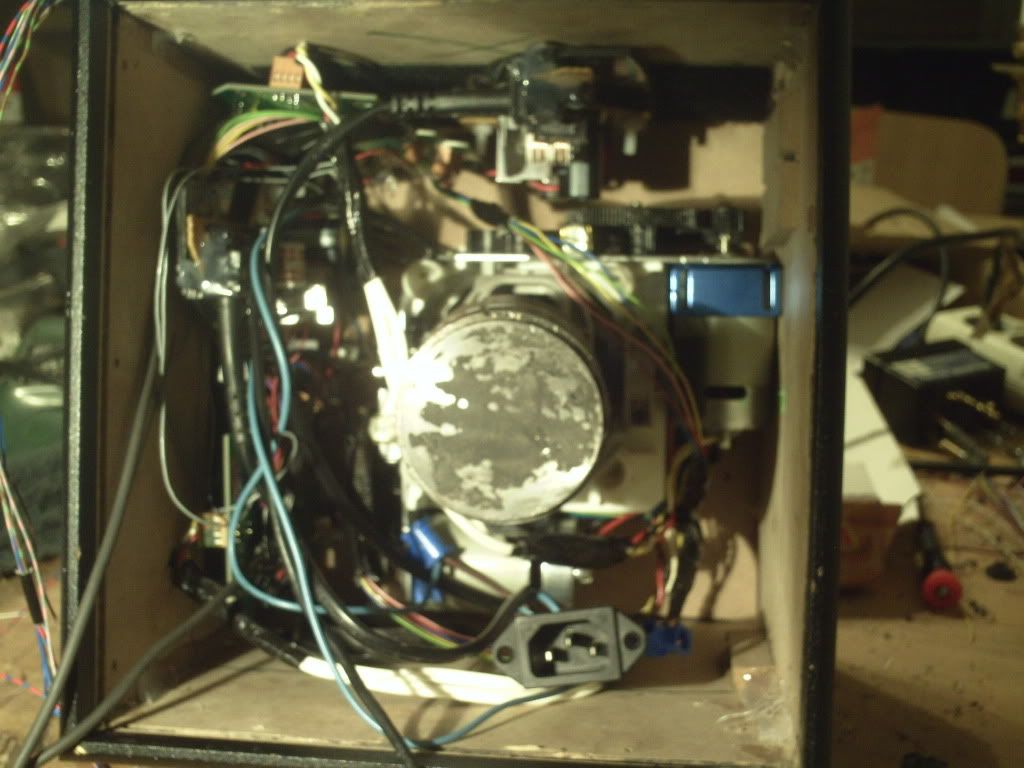 almost forgot .... 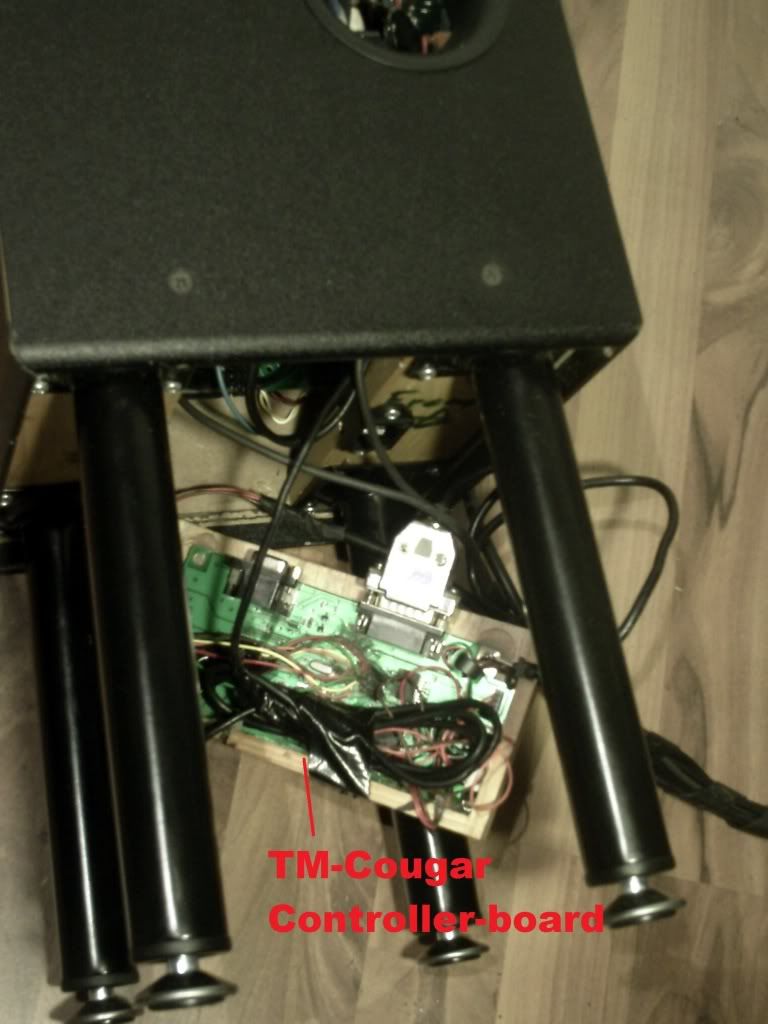 But It just fitted !!! ( the controller board of the TM-Cougar is behind the wooden plate in the middle) All held reliable together by Velcro! From the board goes a 5-pin cable through the FFB mechanics, to the s-shaped tube, into the metal joint of the TM-Cougar that connects to the cougar grip. 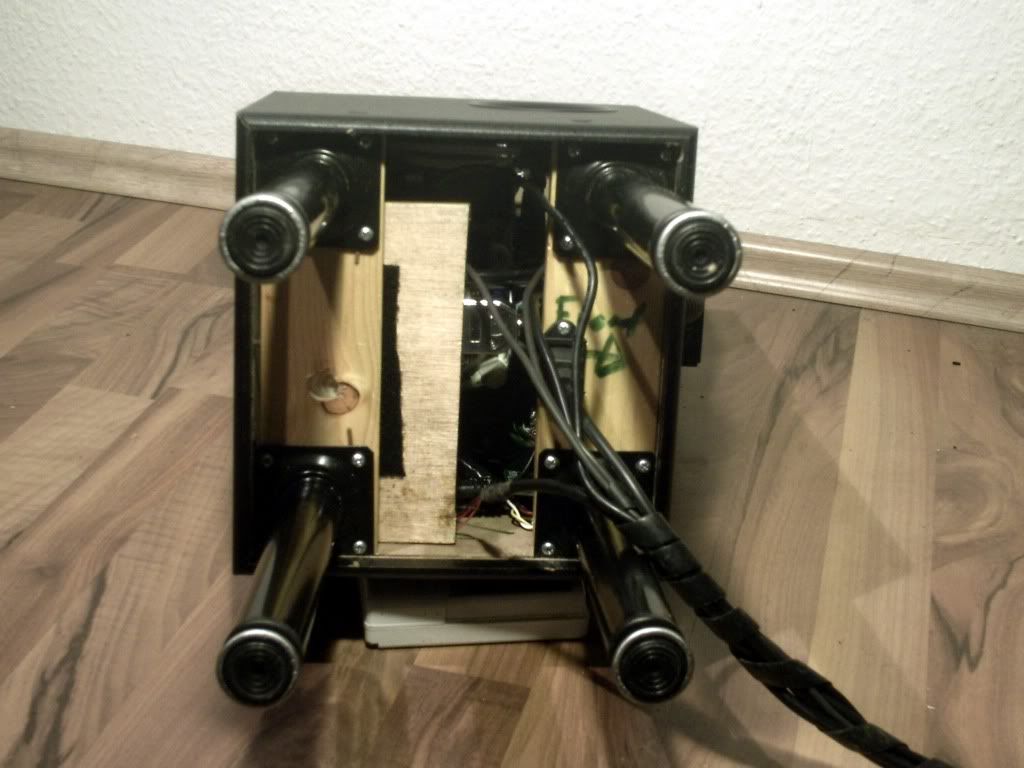 Scrapyard ...!: 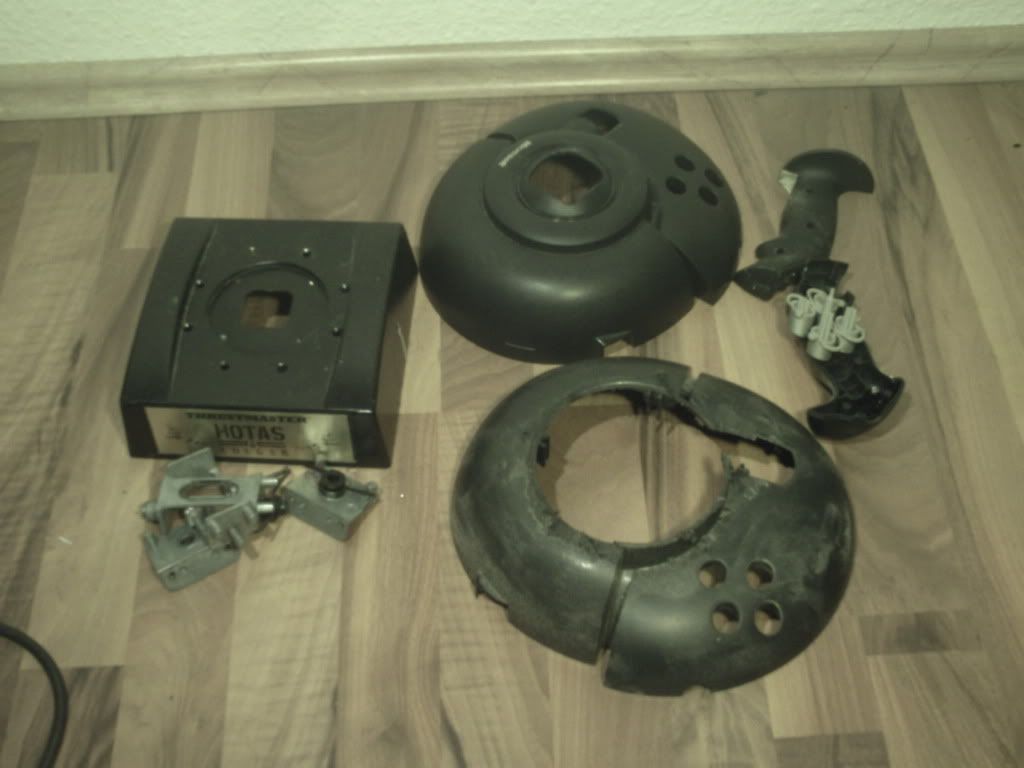 Very Important thing: 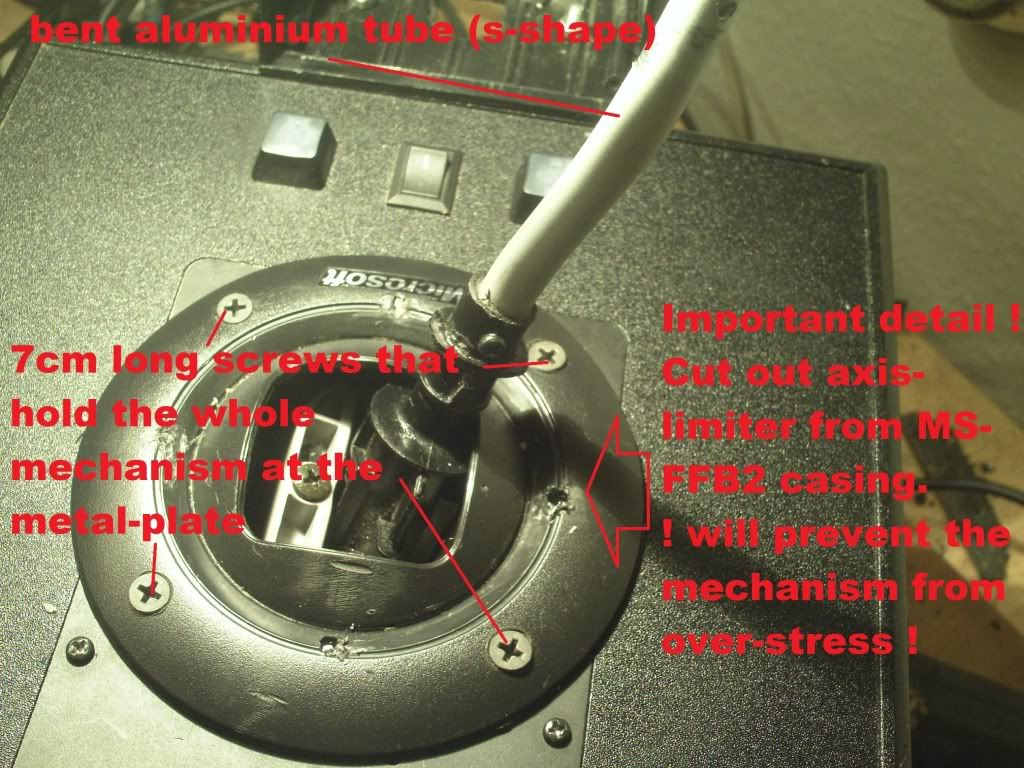 Very important but isn't shown: To make both MS-FFB work together in sync you have to mirror the X and Y axis of the second (the lower one) FFB-Mechanism. That means you will have to swap the cables for both potentiometers and also swap the cables for both motors. (what is connected to + has to be connected to the - ). Potis for X/Y axis : swap the brown and the orange wire(leave the red one as it is) and also connect x to y and vice versa. - do the same with the wires for the motors. And I also extended every wire so I could connect everything back together in the end. I also used hot-glue/lock-tight on every screw/nut - so It can't get loose when the motors vibrate. The controller- boards are simply hold by hook and loop fastener sticky-pads - so It is easy to maintain (If needed) and so it was easy to put them inside the box. As you can see - there is no more room left (not even a screwdriver ) - so Velcro was the best and only solution. In DCS I only have asigned the x/y axis of the upper MS-FFB2. Edit: Before this question(s) arise again I will post a PM conversation: Quote:
Last edited by Peter_P; 01-29-2012 at 09:37 AM.
|
 |
|
|


 Linear Mode

