Quote:
Originally Posted by sniperton

Thanks guys for the advice, but as I wrote, first I took out the tail gunner from a quick pass from upper right (hence the damage on the right elevator and on the tail section on the fuselage), then I cut back on throttle and sneaked closer, hanging around in a distance of about 150 to 200, yo-yoing from upper right to upper left, aiming at vulnerable parts, but I didn't have a rudder pedal in those times, so I had to rely on a sort of spray and pray tactics. What astonished me, and it was my original point, that the Wellington LOOKED severaly damaged, and still it flew. I think its damage layer is a bit overdone.
|
Possibly a matter of taste... but I think the artist was trying to show the unique construction off the aircraft.
Wellington battle damage sometimes looked like this:

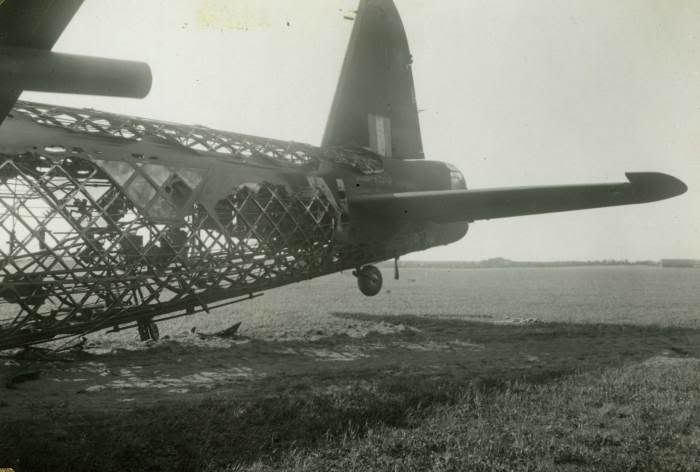
Remember, in a typically constructed aircraft using monocoque design the external skin is supporting the load (like an egg). With the Wellingtons geodesic construction, its the framing under the skin that keeps it together. The skin can be torn of burnt off which looks horrible but it doesn't mean that the airframe wasn't still capable of being held together.
BTW: I did some shoot em up with the Wellington tonight and the point you want to aim at is the wings on the outside of the engine. The fuel tanks don't take too much before they light on fire.