
|
|
|||||||
| IL-2 Sturmovik The famous combat flight simulator. |
 |
|
|
Thread Tools | Display Modes |
|
#1
 05-03-2011, 02:31 PM
|
|||
|
|||
|
How to use MIDI control surfaces to control axes and buttons in games
Abstract Having run out of buttons and analogue outputs on my gamepad controller I looked around for a suitable device i already owned and saw my Korg Nano Kontrol bursting with buttons and sliders galore. I attempt to link this device to a flight simulator as a virtual joystick utilising whatever software made it most simple. Ultimately, I used GlovePIE and PPJoy for PC to provide the virtual 'stick port that the simulator can "see". *edit* User "tête en l'air" has informed me that Mac OSX users can purchase ControllerMate for $15 and achieve the same results. Will update again when have more details. *edit* 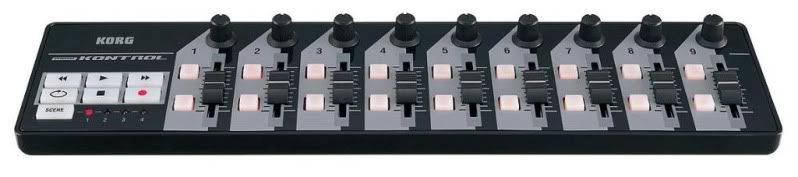 Korg Nano Kontrol Method This device has 9 channels each with fader, pot and 2 buttons each. Enough to be getting on with I feel. The problem is this is a MIDI device plugged into the computer via USB2 and as such produces MIDI control changes (cc#) which most programs bar audio software ignore. To put it simply most programs and games won't register a button press or fader/pot slide from this device without some software based jiggery-pokery. There's no shortage on the web these days of scripts to convert joystick or gamepad movements/button presses into MIDI data in order to control sequencers and effects units etc. However, the reverse process seems to have been somewhat overlooked. When I had the idea to use a midi device as an in-game controller I looked everywhere for the advice I needed to make the link-up without success. Cut a long story short here's the solution i came up with after some cogitation and moderate expleting. To convert a MIDI device into a joystick/gamepad you will need two, maybe three programs. GlovePIE to capture the control surface movements and button presses of the device (Nano Kontrol in this case). PPJoy to create the virtual joystick port that the game (or other program) can then see and utilise. Optional software. The device's MIDI implementation datasheet or program that can read what MIDI data each fader/button sends. In my case I had the software that came with the device, the Kontrol Editor, which lets you view and change the cc# of everything on the device. ControllerMate for Mac OSX will perform the same functions as GlovePIE for PC. This will cost you $15, though, if you roll with Mac, this is probably insignificant. Installation Install PPJoy first. Use all default settings. This gives you a virtual joystick port that your game or program should be able to see. GlovePIE installed using default settings. All you need to do is plugin you MIDI device first, then fire up GlovePIE and start a new script. Preliminary Maths Ok this is tricky for some, I'll try and KISS it (keep it simple, stupid). Each MIDI fader or pot sends a range of data between the values of 0 and 127 (in decimal). This means only postive values up to 127, or zero, can be outputted. An axis however, like the joystick x or joystick y axes, sends values between -1 and 1 passing through 0. This means negative values are also needed. So to make a value of 0, 127 into a value -1, 1 we need to set the input variable in GlovePIE to the MIDI type. Glovepie then automatically converts a 0,127 input range to a 0,1 output range, a value between zero and one unit. Input range = 0,127 Fader or slider on the MIDI device Divide input value by 127. Glovepie converts the input by dividing by 127 so that 0 becomes 0 and 127 becomes 1. Output range = 0,1 Now we need negative values as well if we're making an axis like on a joystick (range = -1, 0, 1) So, this value that we get from the MIDI controller is a value between 0,1. If we multiply this new value by two we now get an increased output range of values from 0,2. Input range = 0,1 Multiply range by two Output range = 0,2 See where we're going yet? Now we need to shift this range of values negatively by one, in other words subtract one unit from everything in the range zero to two (0,2) which gives the final range we're after. Input range (0,2) Subtract one unit Output range (-1,1) This final output range is exactly what we're after because joystick axes output values between -1 and 1. -1 is now the absolute minimum value of the slider and +1 is now the maximum. All from a 0 to 127 slider! Love tech... and maths! Now you see how to do it mathematically, we have to make a very simple script in GlovePIE in order to link the device to the game or program. Create the Script Start a new GlovePIE script and type; PPJoy1.Analog0 = ((midi0.cc1)*2) -1 Any other axes you make are going to look just like this so let's understand the syntax. Output Expression PPJoy1.Analog0 is the variable that gets sent to the PPJoy virtual joystick port that we have running in the background (you did install it right?). This "device", the virtual port, is what your game or program will see when you attempt to change default control settings in your game/prog. PPJoy1 is the first virtual joystick. you can make PPJoy2, 3, 4 etc. later if you have more hardware. Analog0 is the first controllable axis on the 'stick, ie. the x axis. Analog1 would be the second controllable axis, ie. the y axis. Analog2, Analog3 etc. would be further axes you could setup as outputs from GlovePIE. Input Expression midi0.cc2 is the variable for the slider control input you want to attach to the virtual joystick output. Check the MIDI implementation chart for your MIDI device to find the control change number (cc#) for the slider you want to assign. The function, midi0.cc2 takes the midi value of cc2 between 0, 127 and divides it by 127 to give a new value between 0,1. The zero in midi0.cc2 just means midi channel 0. It could be midi channel 1, 2, 3 etc. ie. midi1.cc2 or midi2.cc2 etc. The cc# could be midi0.cc3 or midi0.cc4 etc depending on the device. But pure experimentation is a lottery, with slightly better odds, and a waste of time. Look up the MIDI chart for the device or better still, get the editing software for it and change them all to the cc# you choose if you so desire although you're better off sticking to defaults for now. Now the maths is applied (restrict 0,127 to 0,1 then multiply by two and take away one) by placing the restricted value 0,1 inside brackets, which is then multiplied by 2, ie. (midi0.cc2)*2 Then we place this whole expression in brackets and subtract 1, ie. ((midi0.cc2) *2) -1 This value is then placed in variable PPJoy1.Analog0 through the expression, PPJoy1.Analog0 = ((midi0.cc2) *2) -1 And is output to the PPJoy virtual joystick driver. Simply copy and paste this expression a few times and then change the Analog, midi and cc# to the particular fader/pot on your device. The buttons are much simpler as you can see in the final script i've posted. Analog is replaced by Digital and the same rules apply as above except we have no need for the maths, since there are only two states for the button, on or off. Again, you can change Digital, midi and cc# to suit the particular output/input you require. Simply plugin your device run the script and fire up your simulator and you'll have a new virtual joystick with more axes and buttons than you've got digits! If it doesn't work, try a restart of everything, maybe even the computer and start in the order above again - Device plugged in, GlovePIE started with script running, fire up sim. Debugging There is a debug line at the top which outputs to the function bar in GlovePIE so you can see the mathematical output of your script for a particular variable, in this case PPJoy1.Analog0 and PPJoy1.Analog1. This is useful for changing the maths and getting an idea as to what the output is doing. I include it for experimentation purposes only and it can be safely deleted from the script if not required. Conclusion GlovePIE is a great tool for linking devices and with a little experimentation very useful results may be achieved. Don't disregard MIDI devices especially control surfaces you have lying around. They can be put to excellent use in many applications. I use this setup for flight simulators and driving games, but it would be equally applicable to creative software like photoshop or Maya and even programs like Office with a little tweaking. I'm sure you can think of more uses. I hope this post has been of use to someone. I searched for hours to find what turns out to be a very simple solution to a simple problem. If you can think of anything that might add to this article please post! GlovePIE script to link a MIDI device to a virtual joystick port through PPJoy // Korg Nano Kontrol script for GlovePIE by arketype May 2011 // Change the cc* value to that of the slider/fader, // potentiometer or button you wish to activate on your midi // device. // Change midi* to the midi channel of your midi device (usually // zero, unless you have changed it). // Change Analog* to the axis number you wish to activate on the // virtual joystick. // Change Digital* to the button number you wish to activate on // the virtual joystick. // Change PPJoy* to create and add more new virtual joysticks, // if you have more hardware. // Copy the entire document and paste into a fresh GlovePIE // script and after adjustments for you hardware device // click "Run" // Test it all through "settings - joystick - properties" in // GlovePIE to see the faders/buttons moving. debug = [ PPJoy1.Analog0, PPJoy1.Analog1 ] // debug variable outputs of x and y axes on for reference only // can be deleted or modified to return different axes or button // values. PPJoy1.Analog0 = ((midi0.cc2)*2) -1 // x axis PPJoy1.Analog1 = ((midi0.cc14)*2) -1 // y axis PPJoy1.Analog2 = ((midi0.cc3)*2) -1 // z axis PPJoy1.Analog3 = ((midi0.cc15)*2) -1 // z rotation PPJoy1.Analog4 = ((midi0.cc4)*2) -1 // slider PPJoy1.Analog5 = ((midi0.cc16)*2) -1 // slider PPJoy1.Analog6 = ((midi0.cc5)*2) -1 // x rotation PPJoy1.Analog7 = ((midi0.cc17)*2) -1 // y rotation PPJoy1.Analog8 = ((midi0.cc6)*2) -1 PPJoy1.Analog9 = ((midi0.cc1 PPJoy1.Analog10 = ((midi0.cc PPJoy1.Analog11 = ((midi0.cc19)*2) -1 PPJoy1.Analog12 = ((midi0.cc9)*2) -1 PPJoy1.Analog13 = ((midi0.cc20)*2) -1 PPJoy1.Analog14 = ((midi0.cc12)*2) -1 PPJoy1.Analog15 = ((midi0.cc21)*2) -1 PPJoy1.Digital0 = midi0.cc23 // button 1 PPJoy1.Digital1 = midi0.cc33 // button 2 PPJoy1.Digital2 = midi0.cc24 // button 3 PPJoy1.Digital3 = midi0.cc34 // button 4 PPJoy1.Digital4 = midi0.cc25 // button 5 PPJoy1.Digital5 = midi0.cc35 // button 6 PPJoy1.Digital6 = midi0.cc26 // button 7 PPJoy1.Digital7 = midi0.cc36 // button 8 PPJoy1.Digital8 = midi0.cc27 // button 9 PPJoy1.Digital9 = midi0.cc37 // button 10 PPJoy1.Digital10 = midi0.cc28 // button 11 PPJoy1.Digital11 = midi0.cc38 // button 12 PPJoy1.Digital12 = midi0.cc29 // button 13 PPJoy1.Digital13 = midi0.cc39 // button 14 PPJoy1.Digital14 = midi0.cc30 // button 15 PPJoy1.Digital15 = midi0.cc40 // button 16 Last edited by nearmiss; 05-17-2012 at 04:28 PM. Reason: corrections 
|
|
#3
05-12-2011, 01:33 AM
|
|||
|
|||
|
Thank you so much. This has worked 100% and I had no idea it was so simple. Thank you for taking your time to do this. You have truly helped at least one person
|
|
#4
05-12-2011, 08:53 PM
|
|||
|
|||
|
This looks interesting, works with any OS, Win7, Vista and 32bit or 64bit?
__________________
Salute! Wilcke 
|
|
#5
05-12-2011, 09:22 PM
|
|||
|
|||
|
Thank you!
Very interesting!
__________________
 
|
|
#7
02-03-2012, 09:50 PM
|
|||
|
|||
|
that is EXACTLY was i was looking for! I already own a Korg Nano Kontrol as i use it for music but i am a hardcore flightsimer too and it would make such a good add-on for simming!
unfortunatly i can't find PPjoy installer... the website you posted is too old.. the links on it are all dead.. i managed to find the programmersblog but he does not put links to where to download ppjoy nowhere... i'm kinda lost now ... thanks! UPDATE i have found version 0.8.4.6 who is working on win 7 ultimate X64 now i'd like to know whith you script only the 4 left sliders & the 4 left nobs are working and get recognize by Xplane... is there any way to actually get them ALL to work + the buttons? Edit#1: i've managed to have all my sliders & knobs to work creating 3 different devices in PPjoy... ppjoy1, ppjoy2, ppjoy3 and editing your script... but i can't manage to get my buttons to work... i tried switching them buttons from Digital to Analog... it works... but the key don't toggle like i would assume it should do... it only have the ON position whil i press it ... when i remove my finger it goes back to off... so i assume Digital is the way to go for them buttons... but can't figure out how to make em work... Last edited by reflectingod; 02-04-2012 at 12:49 AM.
|
|
#8
12-01-2012, 04:55 AM
|
|||
|
|||
|
I want to configure my nanoPAD2 to control mouse click. that is when I press the pad i want to move cursor to a specific location and do left click.
I am not able to get input from my nanopad 2, below is some stuff I got out of GlovePIE using debug InDevName = NANOPAD2 1 PAD OutDevName = NANOPAD2 CTRL 1 My pads sends following notes on Channel 3 (C3, C#3 and up) any help appreciated. I can post more data if requested. Please help!
|
|
#9
12-30-2012, 01:19 PM
|
|||
|
|||
|
***** Hero
I asked on Ubi forums if this was possible back in 2004-5. Sadly too late for me; having invested in full HOTAS now for '46 and cliffs. (In-joke for musos - Only challenge now would be to write an aerobatics synth patch for the Subtractor in Reason Last edited by :FI:Sneaky; 12-30-2012 at 01:23 PM.
|
|
#10
02-07-2013, 02:37 PM
|
|||
|
|||
|
PPJoy1.Digital0 = midi0.cc23 // button 1
[/QUOTE] I need help! I have a MidiFighter 3D, and I'm a Industrial designer, I use Photoshop, Rhino, Solidworks, Illustrator... What i want is to be able to use my midi Fighter in these programs! so i can work faster! I need to know how to write the scrip in glovepie in a way that ppjoy creates a virtual joystick that has 4 mode buttons, 4x4 button grid and 6 more extra butons so that with xpader i can set those buttons to diferent leters of a keyboard or diferent comands. for example in mode 1 the first button will toggle letter T (so turns on text function)... I have no idea where to start, my idea is that the first 4 rectangular buttons act as mode buttons, the 16 circular buttons act as buttons on any other joystick, and so do the other 6 butons placed on the sides! As far as i know the midi fighter 3d sends diferent notes on each mode so dont really need to be maped the 4 mode buttons. so i dont know if pp joy has to detect those 4 mode buttons or just detect 4x4x4 (64 butons + the 6 side butons =70 buttons) so what i basically need is, if you could tell me how to do the script for the midifighter because i have no idea where or how to start!! thanks you!! heere you have the info of the midi fighter MIDI notes!! http://www.djtechtools.com/downloads/documents/Midi%20Fighter%203D%20MIDI%20Map%20TRAKTOR.pdf[/URL]
|
|
|
|


 Linear Mode

