
|
|
|||||||
| IL-2 Sturmovik: Birds of Prey Famous title comes to consoles. |
 |
|
|
Thread Tools | Display Modes |
|
#1
 10-13-2009, 11:03 AM
|
|||
|
|||
|
Here, finally are some pics in progress of HOTAS V1. Below are pics of V2 with the analog viewing stick and Attack command wired, and finally pics of the finished controllers
Essential tools needed: Thin tip soldering iron, Scalpels, Pincers, Superglue with accelerator-spray, Multimeter Warning: Allways remove battery before working on the X360 controller, and be careful when soldering wires to narrow PCB track, they rip easily. Here is the V1 Stick opened, ready to take out the hatswitch beacause it will not work with X360 viewing input. You can se the aditional wires added beacuse the stick had common ground for all switches, and X360 has not(as you have seen in the PCB trace doc pictures, a real intermingling mess) The potentiometers are in the base and are connected as described 3 pics down, and in the first post of the thread: 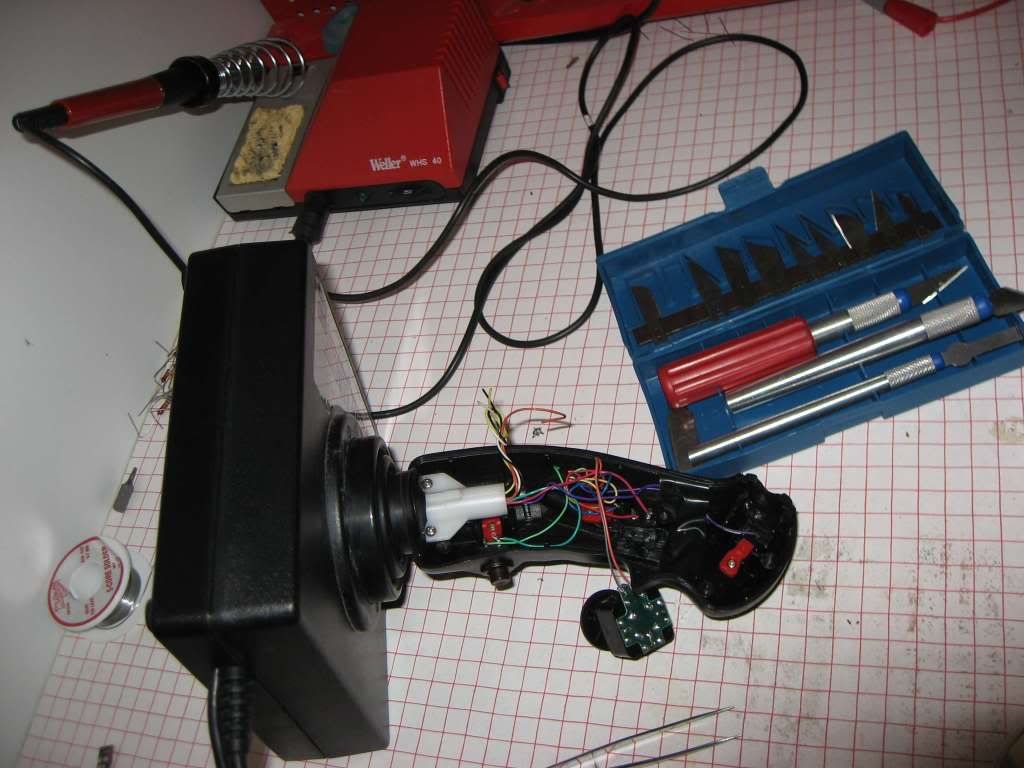 Here is a closeup of the PCB inside the V1 Throttle, with some cuts, mods, and connected wires. It is now ready to fit a Mode-switch to toggle between analog stick free viewing, and rudder/throttle input: 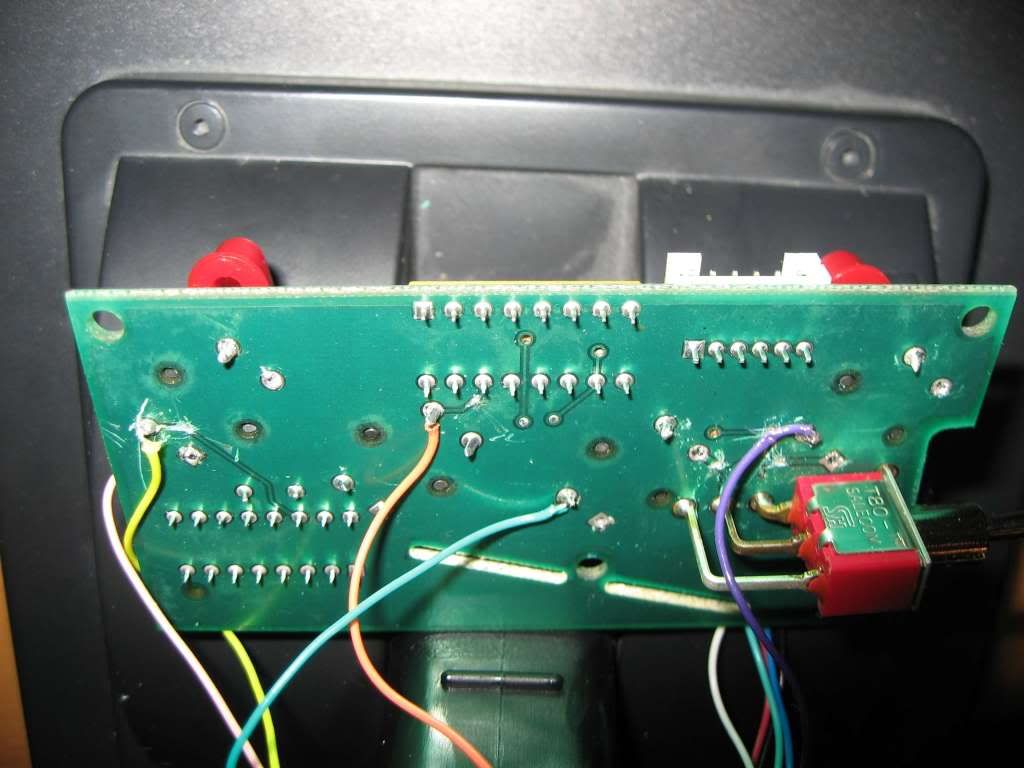 Here is the top of the X360 controller PCB in V1 version. Check photos here for reference to the different signals and traces on the PCB: http://forums.xbox-scene.com/index.php?showtopic=512342 Here you can see how all the buttons are wired out. Its more straight forward if you go stright for the button pads, and not think about saving them as i first did. Scrape off down to bare copper with a scalpel and attach the wire. Keep short wire ends, and tin both the wire and the pad prior to soldering the joint: 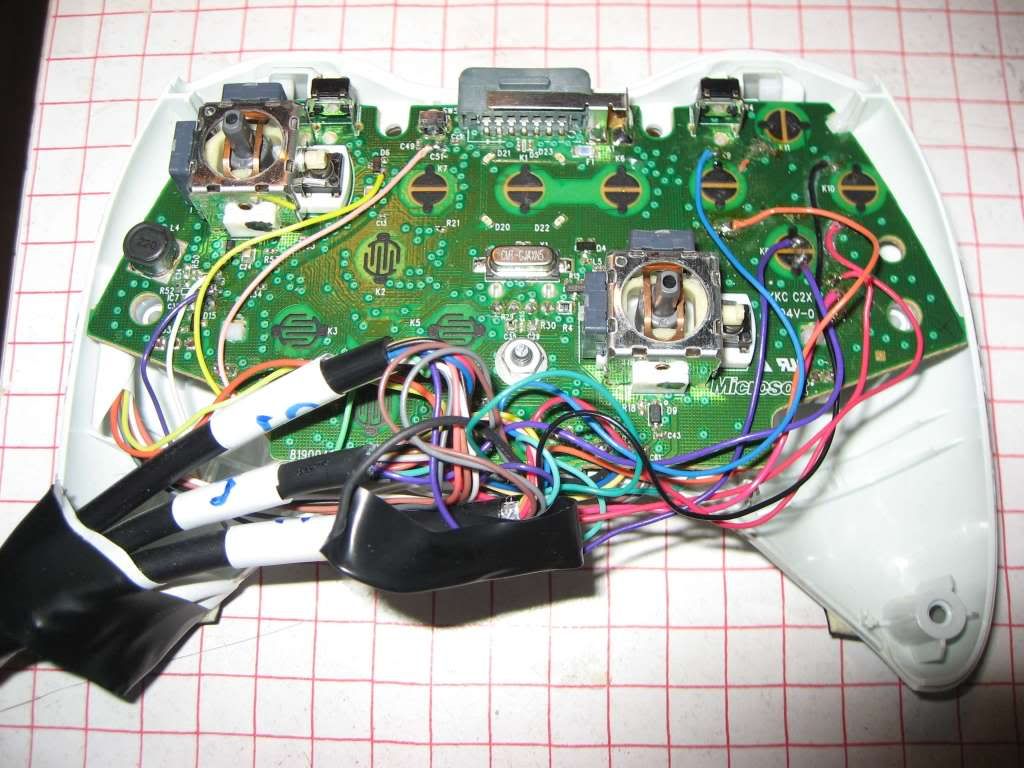 Here is the bottom of the X360 controller PCB in V1 version. Here you can see how the potentiometers (herafter "pots") for Ailerons, Throttle, and Triggers are wired out. The triggers with pots must be removed to come by some of the connection points. Be shure to reattach them, as the device will detect that they are gone and behave badly. Measure and take notes of the voltages at the centre tap of the potentiometers at the extremes and centre stick positions. 0V/Ground and 2V rails for pots are shared, and hence you need only one set of these wires to each flightgear. The centre pot terminal PCB tracks must be cut, because they can not be connected in parallel with the ones on the pots in the flightgear. The wires are connected to the PCB track after the enamel is scraped off. Be careful (!) after the wire is soldered on beacause PCB tracks rips easily. I usually add a drop of superglue to the joint, and the part of the wire touching the PCB, immediately after soldering, and use accelerator spray for instant hardening. Connecting to the Triggers are easier since we need just a simple on/off trigger. No cutting is needed, just attach the trigger switch wires to centre and ground terminal of the trigger pots. Measure the voltages on the centre tap of the Flightgears potentiometers in the same way as above and check that voltages are similar after wiring. If needed tune one end of potentiometer with high k resistors in parallel (I had to do this for one of the ailerons.) No fine-calibration is needed due to the dead-band which is implicit in the X360 controllers reading of potentiometer input. 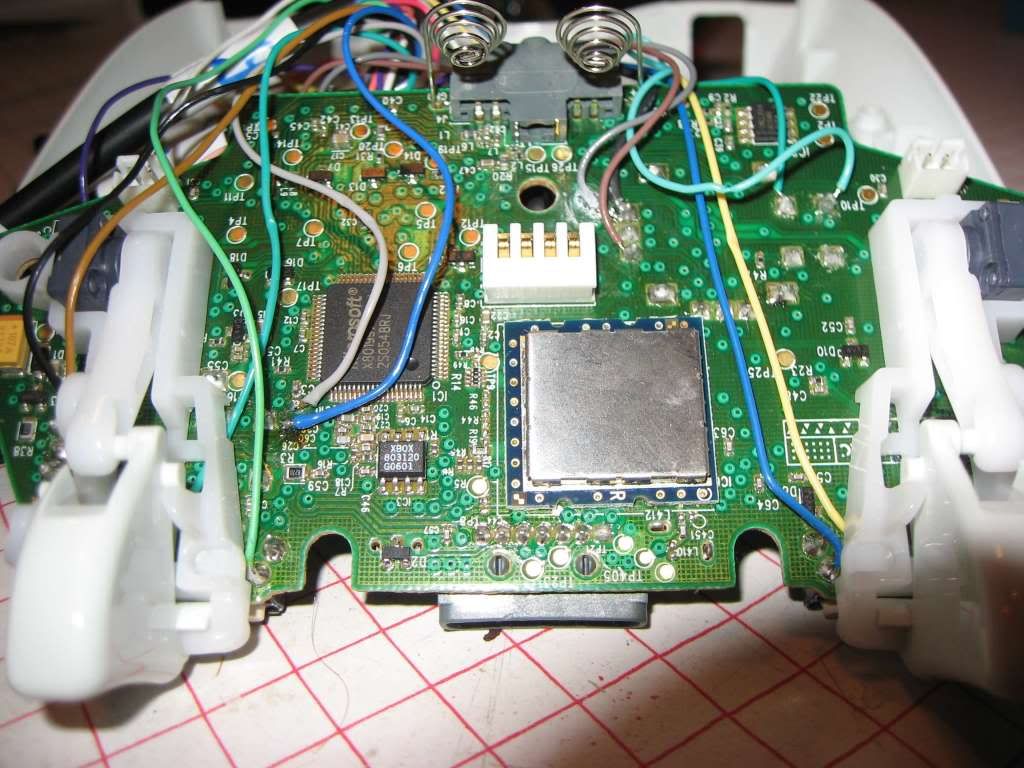 Here, some pics in progress of HOTAS V2. (with the analog viewing stick and Attack command wired) Here is a closeup of V1 Stick opened, with the hatswitch taken out, beacause it will not work with X360 viewing input. You can also see the Analog stick from an old obsolete PS2 controller, which will replace the hat-swich: 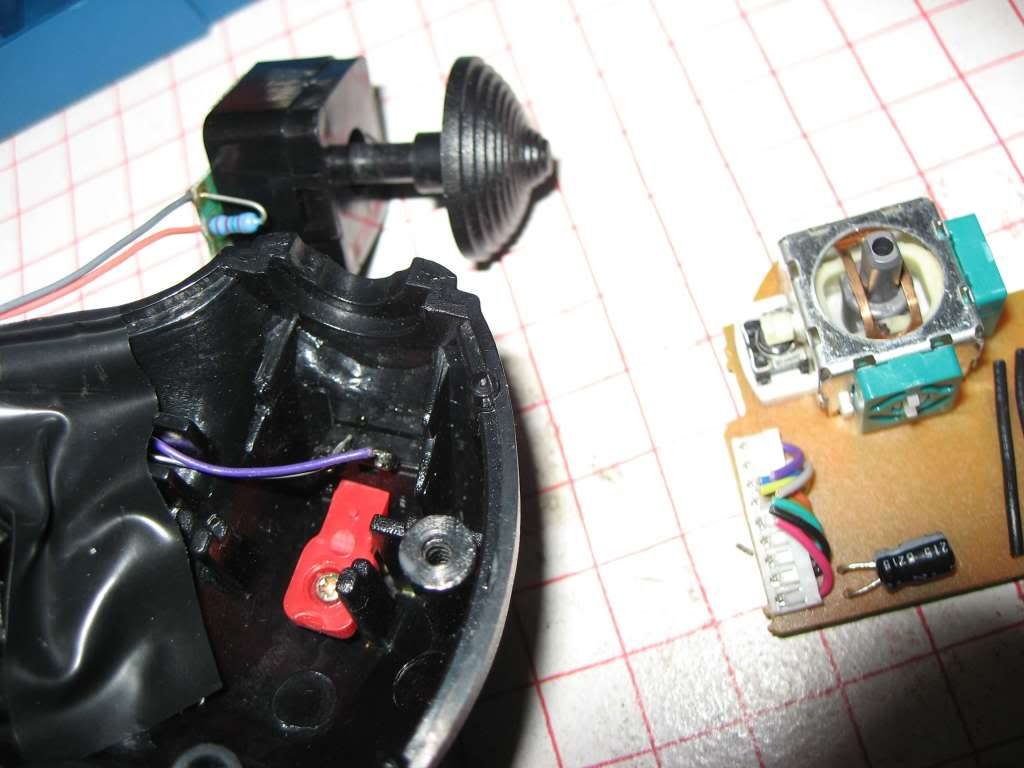 Here is the analog stick fitted and connected. A couple of superglue drops keeps it in place. Only 4 wires are needed, since the Ground and 2V rails are common for all pots: 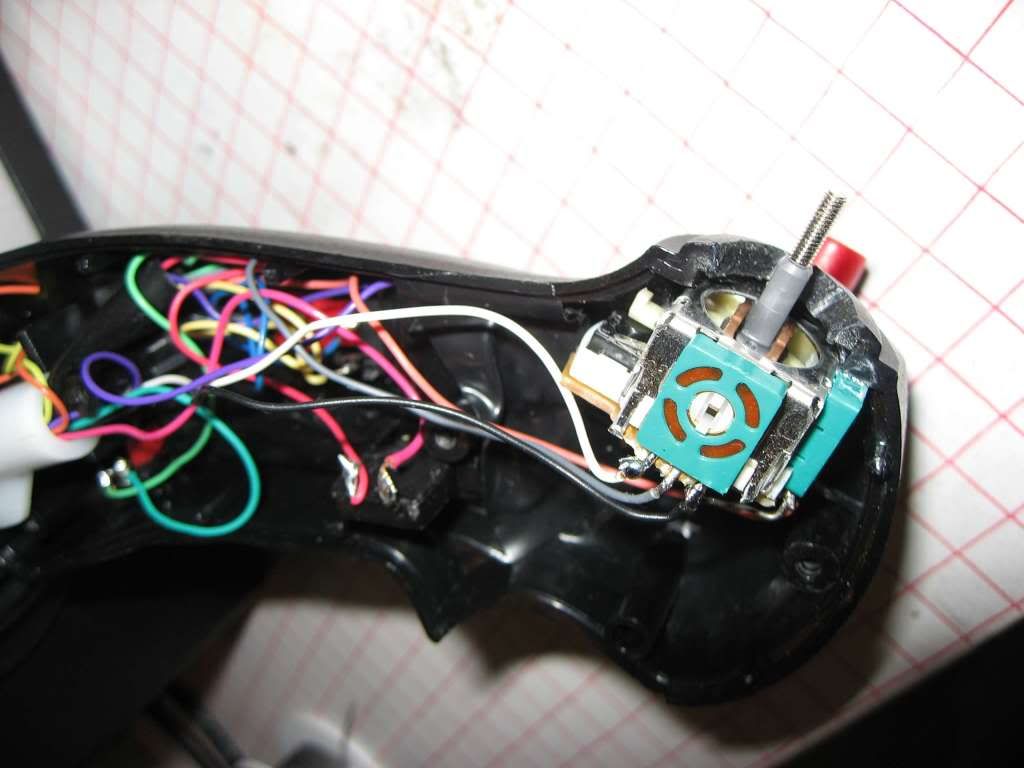 Since none of the pot centre terminals can be paralleled, we need a 2posistion, 3 way switch that can connect the X360 controller input to either the throttle/rudder pots or the viewing stick pots centre terminals. Luckily i found one on an old casette deck PCB that I nearly throwed away a couple of weeks ago. At the same time the switch must control the view switch on the X360 (right stick pressed down). I decided to put the switch in my Throttle quadrant, as it has more space inside. The switch has 6 independent inputs that connect to 2 outputs each, but we will use only use 3 of them: 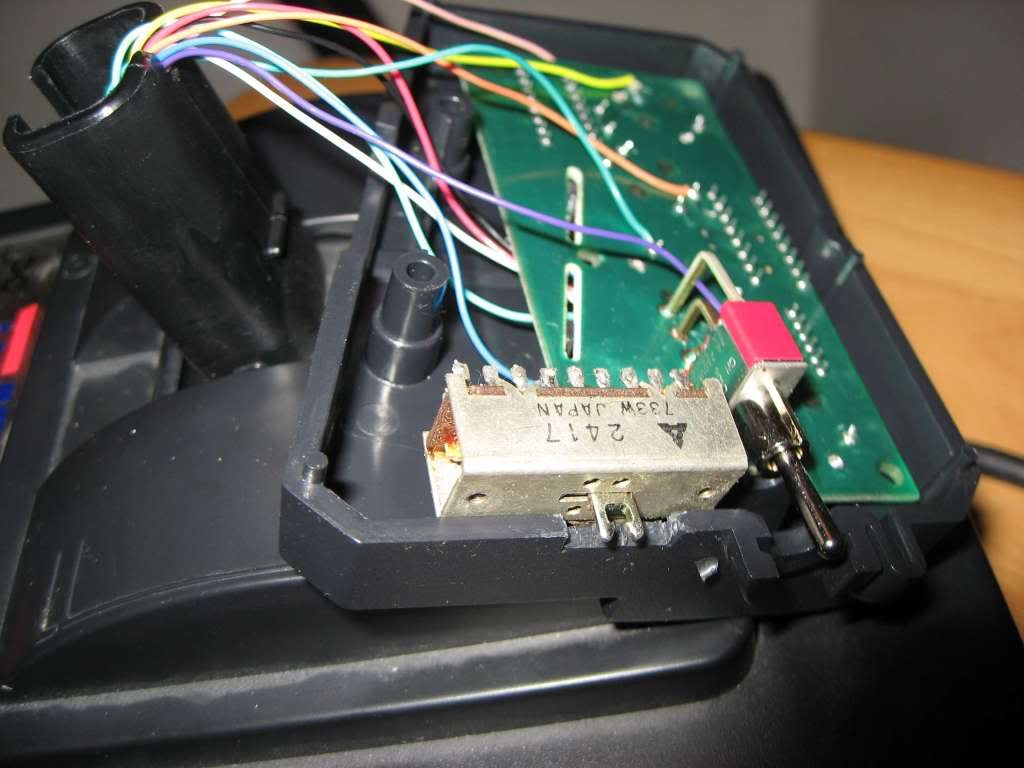 Here is the switch fitted and connected to 8 extra wires that I added. (used an old CAT5 cable, not optimal to solder onto PCB due to stiff wires):  Here you can se how the new wires from the Flightgear are connected to the top of the X360 PCB. Some of them are acually connected outside the PCB (lower part of pic) beacause their signals are just connected between the the two Flightcontrollers. 5 of the wires are connected on the underside of the PCB to the vertical pot and the view switch. You can also see the attack command wired up to the D-pad top, from one of the switches on the Throttlequadrant: 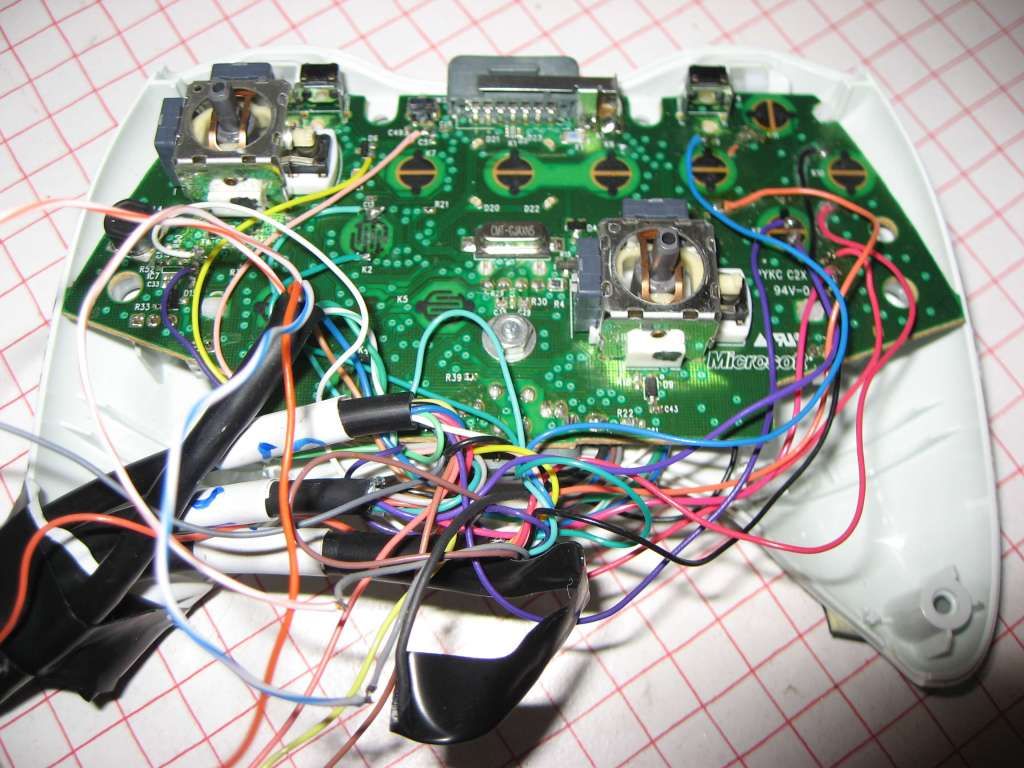 Here are pics of the finished Flight controls Here is the Fightstick with the custom analog viewing stick on top: 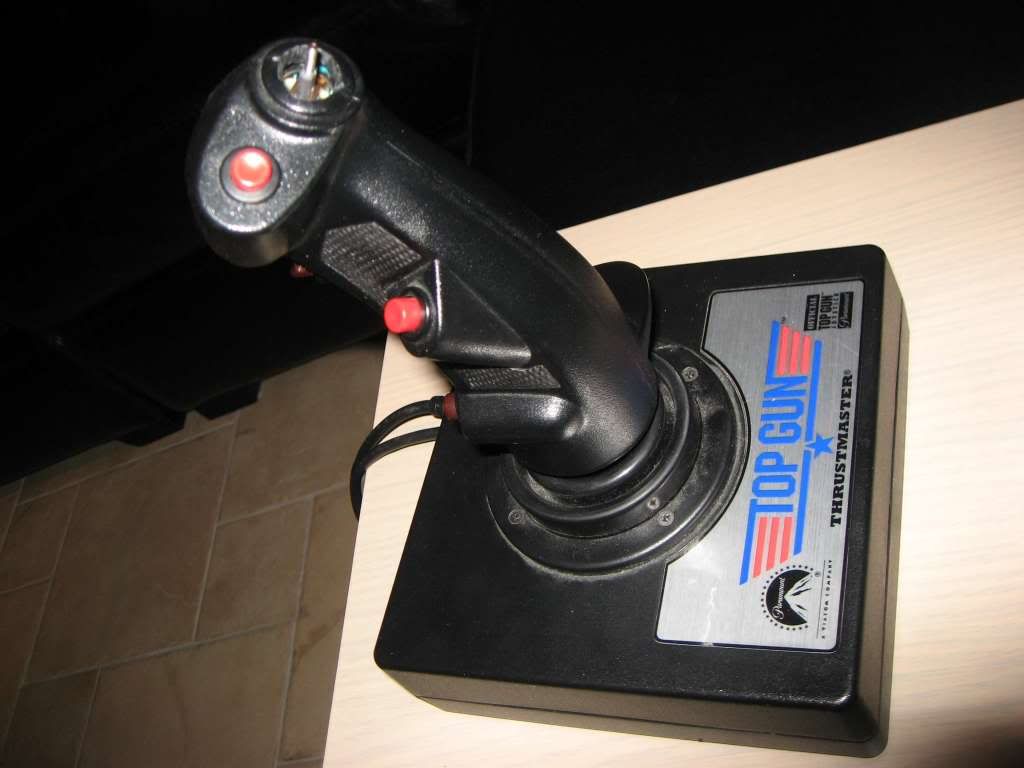 Functions on the Flightstick: -Fire -Next target -Rockets -Bombs -Analog view -Ailerons Here is the Throttle quadrant with the new Mode-switch (bet you recognise the button from the old PS2 controller). Strangely this new function worked perfectly at first go  . Such things never do... . Such things never do...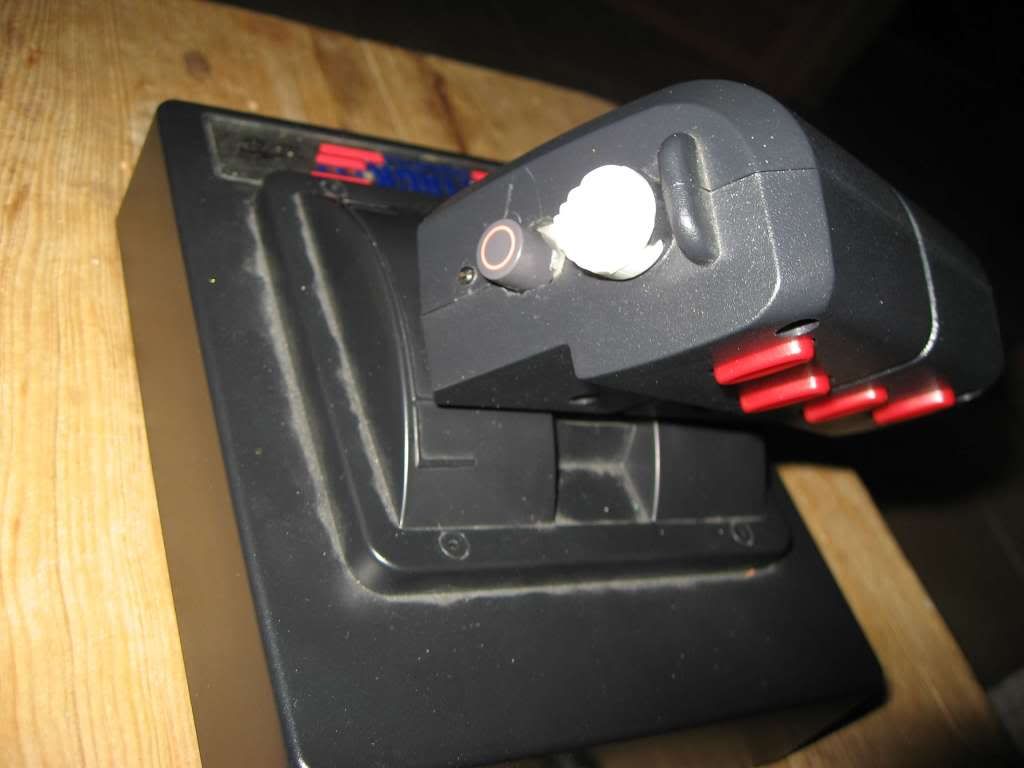 Fuctions on the throttle: -Target cam -Attack command -Change view -Toggle landig gear -Zoom -Map -Mode switch: Throttle/rudder input OR free view input -Throttle Here is the X360 Controller with the toe operated rudder mounted. There is more work to be done to package the unit, and improve the rudder rudder control mechanically. But it works, believe it or not 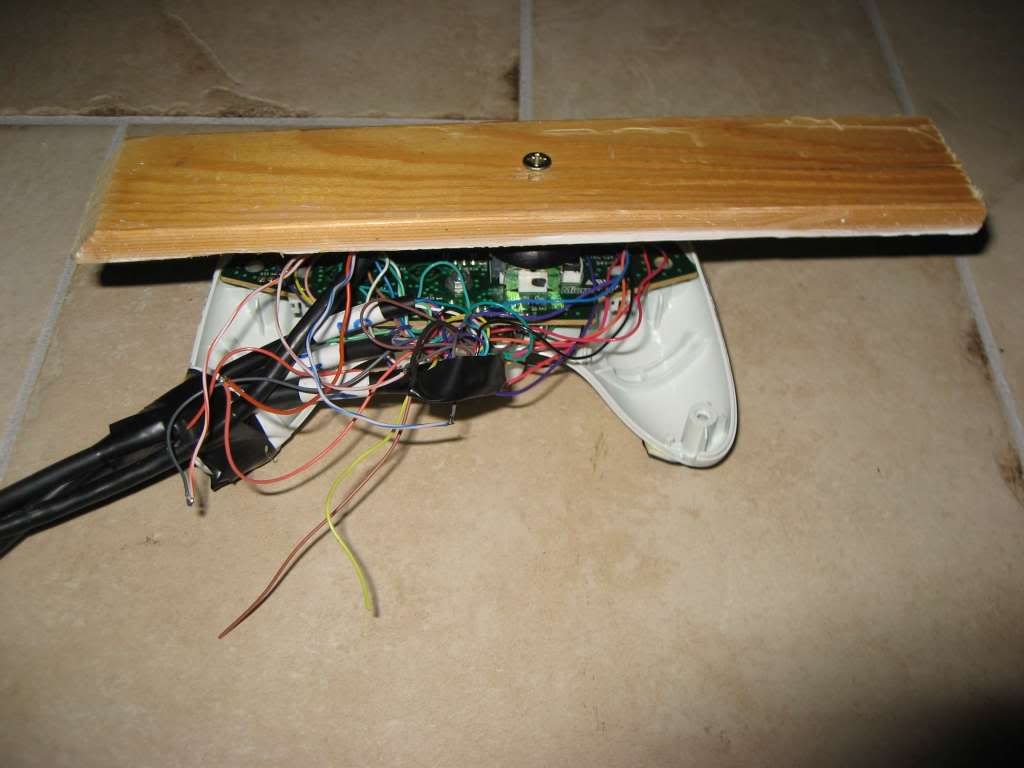 Couldnt resist adding a pic of my screen and sound system. The contrast and colors are quite acceptable when the room is not lighted as on the pic. I use an Epson TW600 projecting on a 100 inch screen. With 2 subs, bomb impacts are quite satisfying 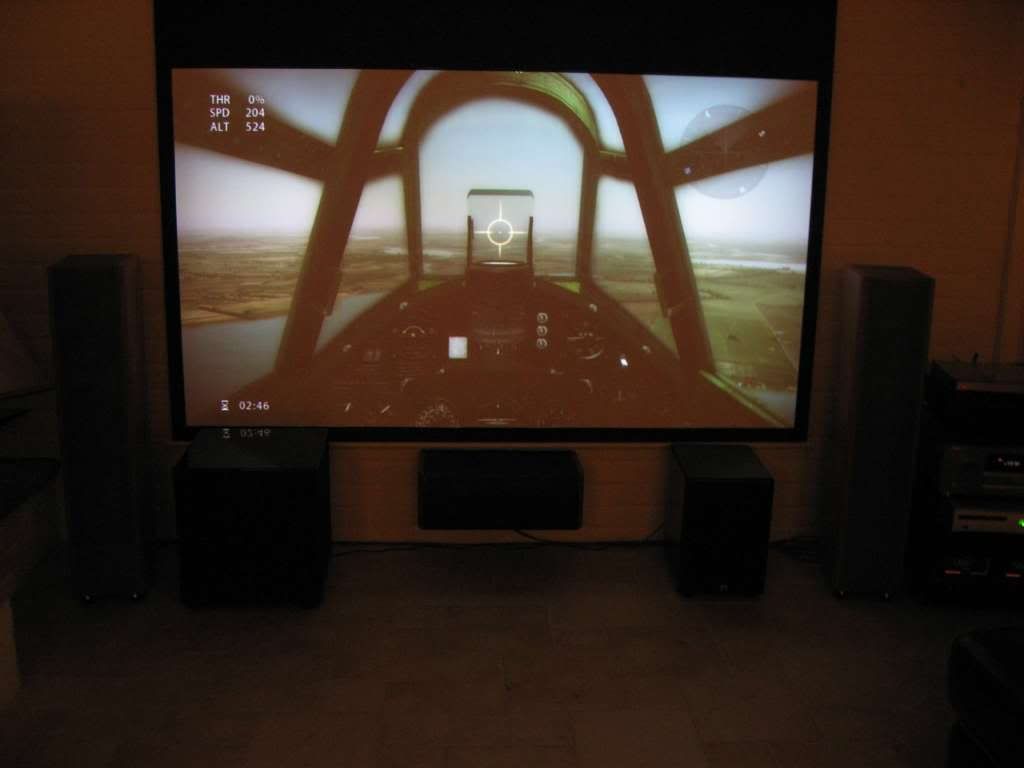
Last edited by Draupnir2; 10-15-2009 at 02:59 PM. Reason: New content in thread 
|
|
#3
10-13-2009, 11:28 AM
|
|||
|
|||
|
He-he !
If I had not been a full time working daddy with 2 small kids, I might have taken on the challenge. For the handy with few other duties it will take a couple of long nights to finish. For me diving in and out of my workshop between diapers it took a couple of weeks
|
|
#4
10-13-2009, 12:08 PM
|
|||
|
|||
|
Nice work! No pictures in progress? You're braver than I am, I'd end up with 2 dead controllers. LOL
|
|
#5
10-13-2009, 12:39 PM
|
|||
|
|||
|
Thanks ! I will take some photos tonight. Hopefully I will manage some decent close-ups.
The X360 controller board contains all the tiny bits which can be challenging, but it is quite robust as long as you avoid tearing of the PCB tracks. It is advisable to go directly for the button pads as solder connections, instead of trying to preserve the original function of the X360 buttons, as I first did. I gradually got accustomed to this X360 controller being irreversibly submitted to my IL-2 setup
|
|
#6
10-13-2009, 02:27 PM
|
|||
|
|||
|
I was planning on doing something like this. My original plan was to use a wired controller due to the price and because I didn't want to worry about battery placement. After a little thought I decided against using a standard controller and here's why.
The right stick on the controller is used for rudder and throttle as well as for free looking. I'm unsure is rewiring a controller would allow for throttle/rudder control while free look is being used. Were you able to overcome this obstacle using a regular controller? My solution is going to be to rewire the Saitek Aviatar joystick since it come with the ability to control the throttle/rudder separate from the free look out of the box. It will also be cheaper in the long run since Amazon is selling the Aviator for about $35 right now. I plan to wire the aviator into an X45, I was thinking of an X52 at first but am unsure if the X52's magnets would cause problems or not.
|
|
#7
10-13-2009, 02:55 PM
|
|||
|
|||
|
Quote:
Up to now I have been playing in arcade, and can use the target view instead of panning manually. I think I will try to rewire the whole paning to the hat-switch of the stick, if possible. Another issue to solve is wingman commands which are not yet wired. I think I have to add some extra switches
|
|
#8
10-13-2009, 02:59 PM
|
|||
|
|||
|
Quote:
|
|
#9
10-13-2009, 03:07 PM
|
|||
|
|||
|
Quote:
|
|
#10
10-13-2009, 08:26 PM
|
|||
|
|||
|
You can unlock the other difficulties by going through the tutorials for them.
|
|
|
|


 Linear Mode

