
|
|
|
|
#1
 10-20-2011, 05:43 PM
|
|||
|
|||
|
Guys, be aware that at the end of the thread on the BIS forums, there is a link towards a much improved version, called FXAA_PPI and with additional features....
Try it, it really deserves a look! http://forums.bistudio.com/showthread.php?t=123121 
|
|
#2
10-20-2011, 05:55 PM
|
|||
|
|||
|
Quote:
Last edited by Tvrdi; 10-20-2011 at 05:57 PM.
|
|
#3
10-20-2011, 06:01 PM
|
|||
|
|||
|
It´s on thread answer #128.
The direct link to the fileset is http://www.assembla.com/spaces/fxaa-pp-inject/documents Last edited by heidelbergensis; 10-20-2011 at 06:05 PM.
|
|
#4
10-20-2011, 08:28 PM
|
|||
|
|||
|
This configuration for the injFX_settings.h looks fantastic on my screen....
/*================================================= ===================================== "USER" ADJUSTABLE SETTINGS ================================================== ====================================*/ // TODO: Normalize values to be on a human range scale, whole numbers prefered, decimals usable for micro adjustments // These values should have min/max limit checks included in their functions, so that the end user doesn't get crazy results /*------------------------------------------------------------------------------ FILTER SELECTION ------------------------------------------------------------------------------*/ // Comment to deactivate an effect. // Example: To disable the tonemap effect, use // in front of #define USE_TONEMAP #define USE_ANTI_ALIASING #define USE_PRE_SHARPEN //#define USE_BLOOM *NOT WORKING #define USE_TECHNICOLOR #define USE_TONEMAP #define USE_SEPIA //#define USE_VIGNETTE //#define USE_POST_SHARPEN //#define USE_FINAL_LIMITER /*------------------------------------------------------------------------------ FXAA SHADER ------------------------------------------------------------------------------*/ // Set values to calculate the amount of Anti Aliasing applied float fxaaQualitySubpix = 0.85; // Default: 0.75 Raise to increase amount of blur float fxaaQualityEdgeThreshold = 0.010; // Lower the value for more smoothing float fxaaQualityEdgeThresholdMin = 0.0233; // Lower the value for more smoothing /*------------------------------------------------------------------------------ PRE_SHARPEN ------------------------------------------------------------------------------*/ //For higher precision in the calculation of contour, requires slightly more processing power bool highQualitySharpen = 1; //0 = Disable | 1 = Enable // Set values to calculate the amount of AA produced blur to consider for the sharpening pass #define Average 0.8 #define CoefBlur 2 // Set values of the sharpening amount #define SharpenEdge 0.2 #define Sharpen_val0 1.1 /*------------------------------------------------------------------------------ BLOOM ------------------------------------------------------------------------------*/ // Number of samples per pixel taken for the Bloom effect. Don't set it to high! 4 = 25spp, 8 = 81spp, 16 = 289spp #define NUM_SAMPLES2 4 // Must be set with a value dividable by 2 float BloomPreset = 4; // Disabled = 0 (Valid Preset Values = 1 to 9) Preset value 1 to 9 takes control over the next 3 settings. float BloomThreshold = 1; // The min. level at which the effect starts (Valid Values = 1 to 9, use decimals for finetuning) float BloomWidth = 1; // Sets the width of the effect (Valid Values = 1 to 9, use decimals for finetuning) float BloomPower = 1; // The power of the effect (Valid Values = 1 to 9, use decimals for finetuning) /*------------------------------------------------------------------------------ TECHNICOLOR ------------------------------------------------------------------------------*/ #define TechniAmount 0.15 // 1.00 = Max #define TechniPower 5.0 // lower values = whitening // lower values = stronger channel #define redNegativeAmount 1.0 // 1.00 = Max #define greenNegativeAmount 1.0 // 1.00 = Max #define blueNegativeAmount 1.0 // 1.00 = Max /*------------------------------------------------------------------------------ TONEMAP ------------------------------------------------------------------------------*/ //#define Gamma 1.10 #define Gamma 1.20 #define Exposure 0.00 #define Saturation 0.05 // use negative values for less saturation. #define BlueShift 0.05 // Higher = more blue in image. #define Bleach 0.05 // Bleach bypass, higher = stronger effect #define Defog 0.055 // Strength of Lens Colors. #define FogColor float4(0.08, 0.28, 0.10, 3.0) //Lens-style color filters for Blue, Red, Yellow, White. /*------------------------------------------------------------------------------ SEPIA ------------------------------------------------------------------------------*/ #define Earthyellow // Color Tone, available tones can be seen in ColorTones.PNG (Do not use spaces in the name!) #define GreyPower 0.5 //(Valid Values = 1 to 9, use decimals for finetuning), defines how much of the grey color you wish to blend in #define SepiaPower 1.1 //(Valid Values = 1 to 9, use decimals for finetuning), defines how much of the color tone you wish to blend in /*------------------------------------------------------------------------------ VIGNETTE ------------------------------------------------------------------------------*/ // Vignette effect, process by which there is loss in clarity towards the corners and sides of the image, like a picture frame #define VignetteCenter float2(0.500, 0.500) // Center of screen for effect. #define VignetteRadius 1.00 // lower values = stronger radial effect from center #define VignetteAmount -0.70 // Strength of black. -2.00 = Max Black, 1.00 = Max White. /*------------------------------------------------------------------------------ POST_SHARPEN ------------------------------------------------------------------------------*/ // Controls additional sharpening applied after previous processing. Strength should be max 0.25! float Sharpen = 0.05; /*------------------------------------------------------------------------------ FINAL_LIMITER ------------------------------------------------------------------------------*/ // Controls the strenght of the limiter. 1.000 for default setting int LimiterStrenght = 1.000;
|
|
#5
10-20-2011, 08:32 PM
|
|||
|
|||
|
Quote:
|
|
#6
10-21-2011, 03:49 PM
|
||||
|
||||
|
Quote:
This new version is much nicer! Now there is no need to edit CoD config files to use DX09 in that this new version supports DX10! And easy to use! It does not get any simpler than this! Just drop the files/folders into your game's root directory and wa-la! I mean you would have to 'try' and F that up to F that up (read dont read the readme.txt) I tried it online last night.. Tried a few servers, never got kicked or any warnings of cheating this or that, so, for now STEAM seems to be fine with it. Now I just need to see if it truly fixxes the 'jaggies' at far distances.. In that no one was online last night that I could find.. I did see a few blimps that looked much smoother at distances, and thier 'dot's at far distance looked better too.. and the transtion from dot to outline of a blimp was.. well not smooth but at least I did not loose sight of it Down side is Ill bet once I get all the settings the way I like it, Luither will pop in and say they got a patch to enable AA in the game
__________________
Theres a reason for instrumenting a plane for test..
That being a pilots's 'perception' of what is going on can be very different from what is 'actually' going on.
|
|
#7
10-20-2011, 10:36 PM
|
|||
|
|||
|
Quote:
Beautiful Sharpness to Textures and a vintage look Before 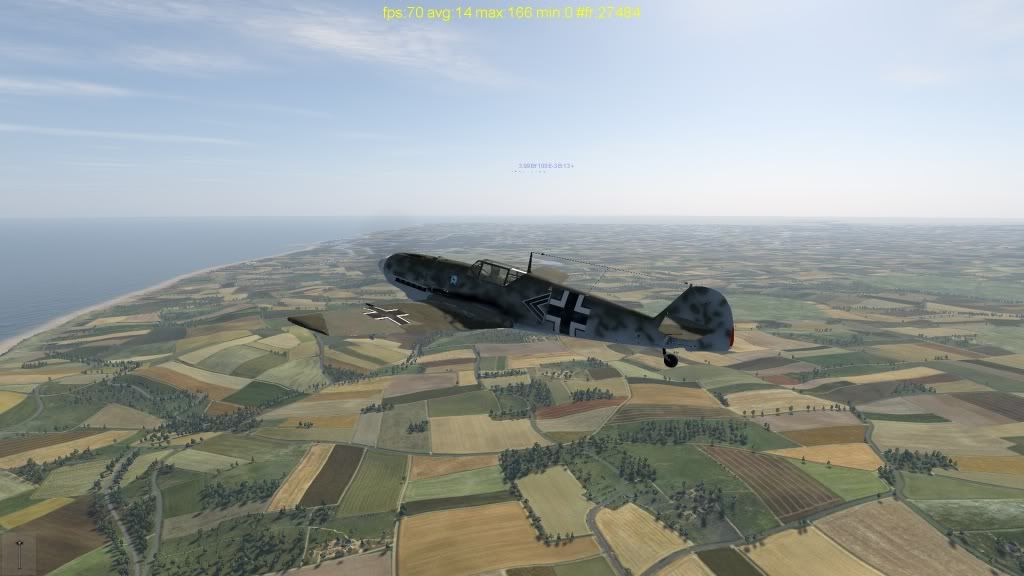 After  Excellent !! Last edited by Havoc04; 10-20-2011 at 10:46 PM.
|
|
#8
10-20-2011, 10:56 PM
|
|||
|
|||
|
Iits nice but I lowered the red a bit...
|
|
#9
10-21-2011, 04:26 AM
|
||||
|
||||
|
So these later versions dont have any more AA effect than the original? I didnt notice any difference.
EDIT: Ok now I do. Less AA Hideous bloom/sephia effect Going back to the first one lol!
__________________
Quote:
Last edited by CWMV; 10-21-2011 at 04:59 AM.
|
|
#10
10-21-2011, 10:36 AM
|
|||
|
|||
|
Quote:
__________________
i5 2500k - Asus P8P67Pro - Crucial M4 64GB - 8GB DDR3 - Geforce Ti 560 1GB - Xonar DG - W7 X64 SP1
|
 |
|
|


 Hybrid Mode
